Technical Terms
Some terms in this guide will be repeated a lot, and thus, it is easier for you (to read and understand faster) and me (to type, obviously) to understand them all. Understand this section well before you continue to read the rest of the guide. It looks like many terms, but many are common sense, and some are used in the game itself.
General
-
Particles
These are what you get for destroying invaders. They come in blue, green, and gold colors. Blue ones are considered the lightest as they get pulled in by your ship the fastest, but they only give you very little energy to recharge your Aura. Green ones are heavier and pulled in by your ship a little slower, but they give you more energy than the blue ones. Gold particles are the heaviest, and they take a lot of time to be absorbed by your ship, but they give the most energy.
-
Shielded

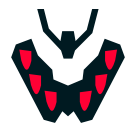
These refer to the blue outline you see on some types of invaders. It also makes the invaders themselves look more blue. These protect invaders from damage while this blue outline is up. After dealing damage to it for some time, the blue outline fades. The icon above represents the presence of Shielded invaders in a mission.
-
Armored

Refers to the gold outline around some types of invaders. These invaders resist some damage if it is not tagged as Armor Piercing. The icon above represents the presence of Armored invaders in a mission.
-
Unprotected

Refers to the grey outline around some types of invaders. All weapons do normal damage to unprotected invaders, but some weapons can do bonus critical damage to unprotected invaders. The icon above represents the presence of Unprotected invaders in a mission.
-
Hull
Refers to the other parts of an invader (which are not turrets or the cockpit) where shooting at it will cause damage to the invader itself (but not any turret).
-
Crit
To score a critical hit on an invader by chance and using a HI weapon, thus dealing bonus damage.
-
Graze
This refers to the technique where your core is dangerously close to a bullet. You can see a small red slash moving from 9 o'clock to 3 o'clock near your core for every bullet you graze. The distance of the red slash away from your core is the maximum distance away from a bullet to perform a graze successfully. You can also graze off a laser; this happens when the white burst of energy runs through the white line (which happens just milliseconds before the white line turns red and becomes dangerous) and zooms past near enough to your ship's core—grazing rewards you a bit of energy to recharge your Aura. You may only graze the same bullet once.
On the left, you can see how the red slash looks JUST after grazing the bullet (shuriken) above the core. On the right, you can see how grazing a laser works. Grazing a laser will also have the red slash, although not visible below.
-
Phase Out
This refers to the fading time of several Auras and Zens. Some of these abilities continue to last for a short/very short time even after their strength is depleted or the Zen is canceled. The most obvious one is Chrono Field, where the term Phase Out literally refers to the effect of invincibility from Chrono Field continuing to last on your ship for an additional 0.5s.
Ships
-
Ship
What you control during gameplay.
-
Core
This is the blinking blue dot on your ship and the only part of your ship that matters. If a bullet or laser (when active, which means red in color) touches it, you die.
-
Projectiles
These refer to every shape or short line/curve a ship produces. Each of these that hit an invader produces an impact sound and this is how a ship does damage to invaders. They have a particular travel speed that varies by ship and does not instantaneously hit invaders, unlike beam weapons (self-explanatory).
-
SB

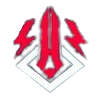
Shield Breaker. SB main weapons deal bonus damage to Shields, destroying them much faster than other weapons. Once the shield is down, they deal normal damage. Ships that have SB main weapons are tagged with the icon above.
-
AP

Armor Piercing. Unlike SB or HI weapons, AP main weapons deal full damage on armor invaders. They also deal normal damage to all other types of invaders. Ships that have AP main weapons are tagged with the icon above.
-
HI

High Impact. HI main weapons can deal critical hits on unprotected invaders, invaders that have their Shield destroyed, or if you hit the cockpit of Armor invaders. Ships that have HI main weapons are tagged with the icon above.
-
x-y-z (where x,y, and z are integers)
Refers to a ship's stats. x is the Level of its Main Weapon, y is its Aura, and z is its Zen. For example, 1-2-0 means the ship has a Level 1 Main Weapon, a Level 2 Aura, and a Zen, which is not unlocked (thus Level 0).
-
Max

Upgrade one of the ship's stats, whether it is the main weapon, Aura, or Zen, to Level 5. Maxing a ship means upgrading it to 5-5-5. The upgrade icon (which appears in the Play Tab only) when the ship stat is not yet maxed is shown below:
-
Ult

Upgrade one of the ship's stats, whether it is the main weapon, Aura, or Zen, to the Ultimate level (sometimes referred to as Level 6), which costs more than 1000¢. Ult-ing a ship means upgrading it completely to 6-6-6. The upgrade icon (which appears in the Play Tab only) when the ship stat is ready to upgrade to ult level is shown below:
-
BoB
Best of Best. This badge is earned when you are first (#1) on the daily mission leaderboard of the highest rank and league, Marshal S4, when the daily mission has ended.
-
sBoB
Specialist Best of Best. This badge is earned when you are first (#1) on the specialist mission leaderboard of the highest rank and Marshal (league does not matter) when the specialist mission has ended.
-
oBoB
Ogon is fine. This badge is earned when you clear a Marshal S4 mission with Ogon on the leaderboard. Attention: if you cover your score with other ships, you cannot claim this badge.
-
Against all odds
This badge is earned when you complete a challenging mission. In particular, when the clear rate of a Marshal mission is lower than 3%, all the players who cleared the mission will earn this badge.
-
Pin of Challenge
A badge out of print. Earned when you played Phoenix 2 in Apple's physical offline Store and you contacted EL.
-
Pin of Excellence
The badge is awarded to players who have made outstanding contributions to the Phoenix 2 game or community. Along with a physical badge, EL will directly message you if he thinks that you deserve this badge.
-
Veteran Badge (a.k.a. Old hand indicator)
A badge awarded to players who have been playing for over a year, displaying how long you have battled in the game.
Everyone says P2 addiction is hard to quit, look at how many old players are still active in the game.
Trivia: Phoenix 2 was released on July 28, 2016, so the oldest hand at present is the recipient of the "Veteran 8" badge.


Invaders
-
Invader
The antagonists of the game. You use your ships' weapons to shoot them down.
-
Sinister
These refer to invaders with camouflage patterns, i.e., grey spots on their exteriors. Sinister invaders are either Shield or Armor invaders.
-
Turret
The source of bullets and lasers which can be destroyed.
-
Cockpit
Refers to the tiny region that is situated at the bottom center of invaders. For invaders with an even number of turrets, you can see a shining oval shape at the center, which is either green (for Sinister invaders) or red / orange (for other invaders) in color. For other invaders, you have to take it as it is there even though you can hardly see it.
-
Type
This refers to the seven different invaders mentioned below: Sparrows, Ravens, Herons, Eagles, Vultures, Condors, and Roc.
-
Affinity
This refers to the three different invaders' coatings: Unprotected, Shielded, and Armored.
-
Dense
This term is used to describe wave formations. When I say the wave is very dense, it means that there are a lot of invaders on screen, and in extreme cases, such as higher-rank daily missions, you may see invaders partially overlapping each other. Generally speaking, if you see a wave, feel immediately overwhelmed, and don't even feel like counting the number of invaders on the field, then it is dense.
-
Heavy
This term is used to describe wave formations. When I say the wave is very heavy, it means there is an unusual amount of large invaders. Large invaders refer to Herons and above. In Acts 1 & 2, seeing 4 or more Herons is a heavy wave. In Act 3 and above, it is heavy if you see 6 Herons and above. It is also a heavy wave if you see more than 3 Eagles on the field and if you see a Vulture and 2 Eagles (included together with anything else).
-
Light
Obviously, the opposite of Heavy is also used to describe wave formations. If you see a wave with only 1 Heron (and a few Sparrows), no more than 6 Ravens, no more than 2 Ravens together with 1 Heron or some Sparrows, or a pure Sparrow wave, then the wave is considered light.
-
Medium
A term also used to describe wave formations, anything in between a Light and Heavy wave is considered Medium.
-
Sparrows
The smallest invaders in the game have rapid random movement and have only one launcher from left to right: Unprotected, Shield, Sinister Shield, Armor, Sinister Armor.
-
Ravens
Small-size invaders with two turrets and fast random movement. From left to right, Unprotected, Shield, Sinister Armor.
-
Herons
Medium-sized invaders with two turrets and one launcher are at the center. Some random movement. From left to right, Unprotected, Shield, Sinister Armor.
-
Eagles
Big-size invaders that take up about half the horizontal screen space with three turrets. Small random movement.
-
Vultures
Giant invaders that span across the entire screen space with four turrets. Minimal random movement.
-
Condors
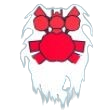
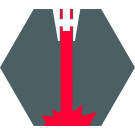
Gigantic invaders that take up half the screen space with six turrets. Near zero movement. Accompanied by only Ravens and/or Sparrows, which spawn at the bottom half of the screen immediately after the wave begins in community and specialist missions, Herons and Eagles may also accompany Condors in daily missions. The icon that indicates the presence of a Condor in a mission is shown above.
-
Rocs
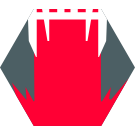
Colossal invaders that take up half the screen space with ten turrets. Near zero movement. The only invaders that take about 10s to arrive on screen fully (after the wave counter has changed) before they can be hit and its turrets start their firing sequences. Accompanied by only Ravens and/or Sparrows, which spawn at the bottom half of the screen immediately after the wave begins in community and specialist missions, while Herons and Eagles may also accompany Rocs in daily missions. The icon that indicates the presence of a Roc in a mission is shown above.
Turrets
-
Bullets
Things generally bright red on your screen will destroy your ship if your core touches them.
-
Lasers
The presence of lasers in a mission is indicated by the icon shown below:
White lines on the screen turn red at certain intervals for a short time, making these red lines deadly, destroying your ship if your core touches any part of the red line. The workings of an actual laser in-game are shown below:
-
Doomsday Weapons
Doomsday Weapons will be abbreviated to DD in this guide. DDL means Doomsday Lasers, while DDMB means Doomsday Bomb.
-
Doomsday Laser
Doomsday lasers are strictly forward lasers with the same width as a Nightfury laser. They generally have a very long reload time, and you can hear and see their charging status when it is just about to fire. You can also see the region of space it will fire upon (it will start to have red glowing particles), and if you are in the way of it, your core will start to flash red at the upper half.
-
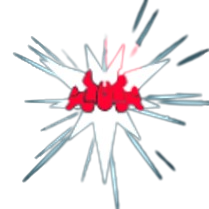
Doomsday Bomb

Doomsday Bombs release a brief shockwave that will kill you if your core is caught in the radius without an invincibility option (such as Chrono Field or Personal Shield). They have a very long reload time, and you can hear and see it's charging status. You can see the radius of the Doomsday Bomb, which is equivalent to the radius of a level 1 Mega Bomb, clearly demarcated by a red border.
-
Doomsday MIRV

Doomsday MIRVs will pop off MIRVs from nowhere around the turrets. When they charge, a red spot will appear on the screen. When they fire, rounds of MIRVs will appear in the red spots and fly forward. Unlike the normal MIRV, they can be activated as soon as fired.
-
Doomsday Super MIRV

Doomsday Super MIRV is very quiet when charging. When it fires, 3~5 huge MIRVs will be shot consecutively. Each huge MIRV can split into smaller MIRVs, and the smaller ones will explode into bullets.
-
Darts
Fast-moving bullets that have a rounded front tip and 2 pointed edges behind.
-
Pellets
Slow-moving bullets that look like elongated ovals.
-
Shurikens
Even slower-moving bullets that are a darker shade of red on the exterior always spin counter-clockwise as they move. Has 4 pointed edges around it.
-
Boomerangs

They are the fastest and the only type of bullet moving in a curve rather than a straight line. And they look like a classic boomerang. The graphics of an actual boomerang in-game is shown below:
-
MIRVs


Nobody cares what they stand for (neither do I), but if you approach these slow-moving (even slower than shurikens, although just very slightly so) yellow / gold rings that leave a flame-like trail behind it, at a certain threshold distance away from your ship's core, they explode. There are 2 types of MIRVs; one is the more common pellet MIRVs, which will explode into 30 pellets evenly spaced apart in a 360° fashion. Each pellet continues to move radially outward from the point the MIRV explodes. The other less common type is laser MIRVs, which emit either 5 or 9 lasers equally spaced apart (in terms of angle) radially outward. They work just like a laser, having an initial period where the lines are white and don't destroy you, and later, they turn red, which becomes dangerous, and finally fade away. Unless specified, MIRVs refer to pellet MIRVs.
-
MIRV Deathonators (Caged MIRV)

Only when equipped at the rear of Sparrows is this equipment (not exactly turrets) harmless until the Sparrows are destroyed. In other words, they do not fire any MIRVs, bullets, or lasers while the Sparrow (and the equipment) exists on the field. However, once the Sparrow dies, the MIRV Deathonator activates and releases 30 pellets equally spaced out in a 360° fashion, the same as the behavior of a pellet MIRV when it detonates. There is no way to destroy the MIRV Deathonator without destroying the Sparrow, as they do not have any separate health. They also do not increase the health of the Sparrow.
-
Laser Spinner

A turret in myth, never installed in the game, but the developper has revealled some of the information. According to the guess, this turret will shoot lasers when spinning itself, blocking your way.
-
Launchers
Launchers strictly fire bullets (not applicable to lasers) forward (or vertically downwards, if you prefer).
-
Spreads
Spread turrets emit more than one lane of bullets (roughly straight and in-line) or lasers.
-
Spinners
Spinners emit bullets in all directions, even behind themselves.
-
Tracking
Tracking turrets will try to aim their guns (visually) such that they align themselves to the core of your ship.
-
Bloomers
These emit a burst of bullets (only MIRVs) in all directions, forming a ring of them spreading radially outwards, below, needing to reload for the next burst. It is similar to how a flower blooms when it opens up. This term is exclusively reserved for MIRVs because no other turrets behave this way; thus, you will only hear of MIRV Bloomers.
-
Tx (where x is an integer)
Tier x. The same turret type has different tiers, and their appearance can easily distinguish them. A higher-tier turret is more deadly and fires more bullets or lasers at once.
-
Mk
Mark. Different attributes define a turret even within the same tier of a specific turret. It varies what the different Marks mean for different types of turrets. Generally, a higher Mark turret reloads faster, thus firing its next burst at shorter intervals. For lasers, a higher Mark also means the tracking is more accurate (it locks onto your ship's core much faster). It is impossible to distinguish the different Marks just by visually looking at the turret. Since it is impossible to determine the different Marks, this guide will only mention higher or lower Mk. (If confused, consider Marks as categories within a single Tier; a higher Mark means a more dangerous category.)
Auras
-
BEMP

Bullet EMP
-
SEMP

Stun EMP
-
Barrier

-
LS

Laser Storm
-
MS

Missile Swarm
-
PD

Point Defense
-
CF

Chrono Field
-
VL

Vorpal Lance
-
Phalanx

-
IC

Ion Cannon
-
GM

Goliath Missile
-
Blade Storm

-
Chrono Hop
Refers to the technique where you can use the 0.5s of Phase Out time (after you leave the Chrono Field or when Chrono Field fades away) to cross a large region of bullets and/or lasers safely to re-position yourself in another part of the playing field.
Zens
-
Kappa

Kappa Drive
-
ML

Mega Laser
-
MB

Mega Bomb
-
MBc
Mega Bomb Fusion Core. The glowing blue orb you see after MB is finished charging.
-
TP

Teleport
-
REMP

Reflex EMP
-
PS

Personal Shield
-
FL

Focus Lance
-
Tracking Minigun

-
Nightfury

-
Kappa Dodge
Refers to the technique where you release your touch to use Kappa Drive in tiny bursts to slow time down and figure out the optimum way to pass between tight gaps of bullets (and lasers if applicable). Before you rerelease your touch, a quick dash is made to repeat the process until you are clear of a tight maze of bullets (and lasers, if applicable) in front of you. The primary purpose of this technique is for desperate survival. However, because of Kappa Drive's ability to generate and attract particles and its proximity to bullets and, thus, massive grazing, you can also gain a lot of aura from this technique.
Miscellaneous
-
AoE
Area of Effect. Refers to Auras and Zens, which either deal the same damage to all targets in range or produce the exact extent of a particular effect on anything that an Aura or Zen deals with. For example, a BEMP completely deletes the bullet the same way as any other bullet in the range of its Aura.
-
OP
Overpowered
-
RNG
Random Number Generator. This term isn't used literally; it refers to the random aspects of the game, such as random invader movements, which vary wildly between each game you play.
-
Upfield
Refers to the playing field at the top half of the screen