
Doomsdays

Wide-range attack leaving you unable to hide (?)

Introduction

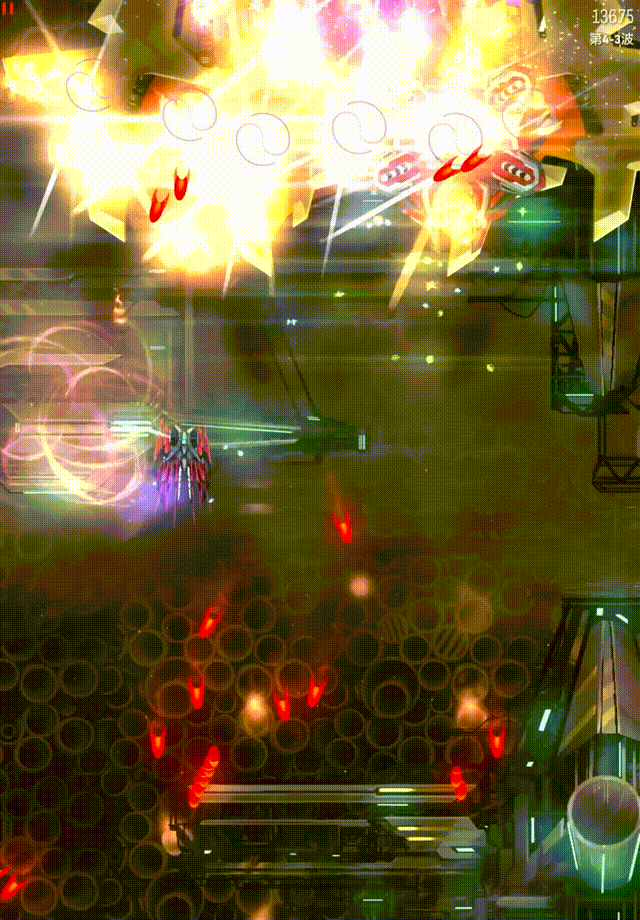
The Doomsday weapons are a series of wide-range attack weapons that will bring you different forms of threats. Generally speaking, if you encounter these turrets during a mission, it's best to pop them first (sometimes there is no need to pop them first, I will explain why).

Doomsday Bomb

  • Assault Pattern: Create a red area with a range of 300, which will explode after 3 seconds of charging, impacting invaders (you) within the range.

Doomsday Bomb is a wide-range bomb that creates a explosion of radius 300. You will not find DDMBs appearing in ranks Captain or below.

DDMBs completely obliterates Barriers and Phalanxes in an instant, and they will not protect you at all, meaning if your core is in the radius, you are dead no matter how many barriers you place or how healthy the Phalanx is.

Despite its scary name, the DDMB is seldom very threatening. The only times when it is very threatening is when 2 DDMBs are on a frontline Vulture, or if more than one are on the front row of turrets on a Condor or Roc that spawns slightly further in front (a Roc spawns further in front when the welcoming party does not take up the upper half of the screen). The other time where DDMB may be threatening is when you are trapped between lanes of bullets emitted by spread turrets. However, you are more likely to die from the bullets coming in front of you instead of from the DDMB itself since going forward will put you closer to point blank range of bullets or any tracking turret. The exception is with laser spread turrets and DDMB, where it can be unpredictable when exactly is either of them going to go off, thus making it confusing whether to push upfield or strafe sideways. Unlike DDLs, the blast duration is short which means you can quickly have enough space to move around again after the blast goes off.

Even if the DDMB is on the frontline, it is sometimes still possible to avoid DDMB by completely cornering yourself to the edge of the screen. However, this does involve a fair bit of RNG, where you must observe the Vulture's movement, and go in the opposite direction it is moving towards. This technique is used for ships that don't have a focused forward firing main or VL against frontline Vultures with DDMBs.

The warning signal that DDMB is about to go off comes pretty early, and it is actually quite easy to see the distinct red border where the DDMB will reach. This radius is the size of a level 1 MB, a radius of 300. The early warning sign of DDMB and the pretty glaring red border is a clear indication to stay clear and you should prepare early to stay out of this border. It is even possible to sneak in a charge forward and then retreat attack when the border first appears. This technique is particularly useful when using BEMP or SEMP against DDMB in very heavy waves, as you want to maximize the utility of BEMP or SEMP. Using PS also protects against DDMB, but usually there is little reason to use PS upfield.

There is little reason to pop off a DDMB unless it is at a threatening position, at the frontline as with the case of Vultures or Condors. At such a position, VLs will make good work of them. BEMPs and SEMPs will also buy you enough time to take them out. Popping off one DDMB is sufficient, and you should work to eliminate other dangerous turrets after destroying one of the frontline DDMBs. Even for Rocs that are slightly more forward, while popping a front row DDMB would help a bit, it does little to help since DDMBs usually come in mass numbers at the front row, and popping one off does little to alleviate the situation. It will help a bit if you pop off DDMBs from the corner to the center, which you can opt to do so if the turrets at the back row aren't terribly threatening.

For the purpose of survivability, DDMB is generally of little threat since staying at the bottom of the field is favourable. For the purpose of speedrunning, since it takes a long time to go off, you just have to be a bit careful and retreat to the bottom of the field once DDMB is about to go off. Otherwise, since you have all the free space from left to right at the bottom of the field, DDMB honestly isn't a huge concern. There is not much need for an Aura or Zen to counter it, unless you are intending to speedrun in which case, resetting the DDMBs is useful.

Doomsday Laser

  • Assaulting Pattern: Create a wide red strip area with a width of 100. After 3 seconds of charging, the laser will shoot for 3 seconds.

Arguably one of the most cruel weapons in the game held by invaders, only appearing on Vultures and above. However, you will not find DDLs appearing in ranks Captain or below. DDLs quickly blast a Nightfury wide laser vertically down.

DDLs completely obliterates Phalanxes and Barriers in a split second, rendering them completely useless. The Phase Out time of both of these Auras are completely negated. A Barrier Reflector or Phalanx Reflector apex will reflect the parts of the DDL it hits but the barrier and the reflection will also only last a split second. In the video below, you can see how devastating the DDL is on barriers, obliterating tons of barriers in one shot.

There are a few ways to counter a DDL. The first and most obvious would be CF. A CF renders you completely invincible even against DDLs. You just have to deploy CF before the DDL fires if you are under the danger zone. Only the audio cue where DDL is charging up is able to tell you to the best accuracy. It is also possible to look at the charging stripe running down the DDL turret but it can be difficult to judge. There is also enough time to Chrono Hop across a DDL being fired if your CF was previously deployed not under the danger zone. The second counter would be PS. Deploying PS before DDL fires also allows you to reflect a DDL. A DDL is considered to consist of 5 individual downward firing lasers, although a typical sized PS would reflect a maximum of 3 such lasers. It is possible to super reflect a DDL just like normal lasers and deal respectable damage, although it's best to reserve a super reflect for normal lasers which are in bigger quantities than a miserable 3 lasers. DDLs have a much longer charge up time, making DDLs fire much later than other lasers. So unless DDL is the only laser on field, there is usually no point to super reflect a DDL.

SEMP also works very well against DDLs due to how far reaching SEMP is with its huge radius. The smallest SEMP will reset the entire DDL's lengthy cycle which renders it pretty much useless. BEMP also works to reset DDLs, although it is not as far reaching as SEMP.

Because Barriers and Phalanx get obliterated in a split second, they are of no use against DDLs. If you have a Phalanx, stay completely clear of the DDL. Even with the Reflective Barrier apex, the barrier will get obliterated with the barrier only reflecting for a split second, hardly dealing any damage.

As the action of DDL is too sudden, TP is a very bad option to do a last minute escape from a DDL. If you are in the danger zone of DDL and you hear the DDL charging sound, move away instead of TP-ing away because your reaction time coupled with the charging time of TP is usually insufficient to escape a DDL. However, TP is a good way to get across the DDL in the case you are cornered and your escape route is blocked off by DDL.

If you have none of the defensive options mentioned above, stay completely clear of DDLs once you are aware of it as the wave arrives. Don't get close to it as the DDL can catch you off guard very quickly even when you are thinking of avoiding it at last minute. Don't rely on sound cues, because it doesn't always happen due to the multitude of other sounds.DDLs are extremely deadly to survival as it severely limits your left and right movement on the field, a vital move when you need to inch around the field when the bullet density is very high. Combined with boomerangs, the combination can be very deadly. DDLs also last quite a while, restricting your movement in that time span, making it all the more worse.

It is recommended you pop off DDLs if you see more than one DDLs on field. If you have CF, well, just do whatever you like, because DDL doesn't do anything to you. You can go about popping off other dangerous turrets instead since Chrono Hopping will always save you. Or you can simply graze off a couple of bullets to gain back a reasonable CF size to counter the next DDL. If there are no bullets to graze...what are you even doing at the bottom of the field? Just go above the DDLs. If you have a PS coupled with CF, BEMP or SEMP (or Stun MS), you can use them in alternate DDL bursts. Or if it's SEMP and it's a dense wave...have fun keeping the DDLs stunned for eternity. If not, you will need to pop off the DDLs on one side of the screen. Vultures with a DDL, coupled with a heavy and/or dense wave can also be very deadly since the DDL cuts off a significant part of the middle column. Depending on the turret composition, if they are not many other bullets on screen, you can simply camp on the other side of the DDL where you will have more space. Otherwise, if there are deadly spinners, you should work to eliminate the spinners on your side of the field and not the DDL, as it is difficult to track when it fires. If the DDL is on a frontline Vulture, then sure, go ahead and pop the DDL, but otherwise, no. If you have VL, however, it can be a very quick solution to destroy spinners even on the side of the DDL. You can even use VLs to line them up against DDLs if the wave is dense enough, but always prioritize spinners first. Using MS to take out DDLs on the frontline Vulture also works. You can go near to both the DDL and the corner turret to take out both turrets very quickly.

An interesting thing about DDL is it can be "delayed" slightly by the Nightfury, since Nightfury will neutralize the DDL. However, since DDL lasts much longer than a Nightfury, you will still get killed unless you move out of the way as Nightfury fires. Using the Nightfury to neutralize a DDL is a very bad idea since you will waste all if not most of the 300 damage of the Nightfury. This feature is simply included for fun as stated by the devs, and is not a viable strategy. This feature was added in v5.0.3 as a fun feature. The left GIF shows how the attempted but failed battle between the DDL and Nightfury (before the v5.0.3 update) while the right GIF shows the actual epic battle between the DDL and Nightfury (after the v5.0.3 update).

  • 天尘座: I will call you Yama if you have Doomsday Speed Laser.
  • 天尘座: Please buy Mirage and battle DDL with Nightfury.

Doomsday MIRV

  • Assaulting Pattern: Create multiple circles (in 3 to 5 circles according to the level) of red points (about 14) around it. After 3 seconds of charging, a forward-flying MIRV will be generated out of thin air at the red light point.

Doomsday MIRV pose the greatest threat, not only covering the entire screen, but even forcing you to explode at least one row of MIRVs. This will result in a lot of bullets appearing on the scene, making your dodging very difficult.

Traditional bullet-clearing skills are still the best way to deal with MIRVs, but the MIRVs by Doomsday MIRV will bring a new problem. If you are using a ult-level Bullet EMP, due to its property of resetting the turret, it is likely to cause the turret's reset. The result is that you will have to face the screen full of MIRV attacks twice in a row. Therefore, the best way is to prioritize the popping of the Doomsday MIRVs, which pose a significantly greater threat than the others. Secondly, if you don't have a good way to pop it immediately, you should use some skill that won't cause it to reset, such as Reflex EMP or Point Defense.

Unlike ordinary MIRVs, the MIRVs released by Doomsday MIRV do not have a flight time of 0.4 seconds and will explode immediately as long as you get close. If you're unlucky and have to clear the mission using some ships with no defensive skills, I've got some suggestions here. If you are using survival ships, you can choose to activate the MIRVs in the two rows first, and then retreat to the back row to dodge them slowly. If you are using a speedrun ship, try to pop the turret first instead of maximizing the output, unless you can directly kill the invader (such as vulture).

Note: It is not recommended to graze the Doomsday MIRV. This skill puts forward very high requirements on timing and positioning, and is useless in most cases (pop them first is usually a better choice). If you don't listen to me and insist on grazing them, you can check the Shogun's Cookbook for detailed study.

  • 圆锥曲线: I'd like Doomsday Laser MIRV.

Doomsday Super MIRV

  • Assaulting Pattern: After 3 seconds of quiet charging, four huge MIRVs will be launched one by one. As you get closer, the huge MIRV will split into multiple smaller MIRVs (14 MIRVs), which will further explode with massive amounts of bullets.

Although the name is "Super MIRV", its threat is not as terrifying as imagined. The strategy is much simpler than the ordinary Doomsday MIRV.

Its characteristic is a very huge MIRV bomb. When there are not too many bullets, you can use any method you like to tease it. Unlike normal MIRV, super MIRVs do not have a flight time of 0.4 seconds and can be activated the moment they are generated. In other words, if you get very close, you can think it as a slightly weaker level-3 MIRV bloomer.

Super MIRV cannot be instantly eliminated by ult-level point defense, but it can be eliminated by other bullet-clearing skills, including teleport.

It should be noted that if you leave the super MIRV alone, you'd better leave it alone and let it fly away. Otherwise, when it explodes in the lower part of the screen, it will be equivalent to a MIRV bloomer close to your face, which is a very dangerous situation. If there is such a super MIRV in a wave of invader attacks, it is a good choice to give priority to activate it.

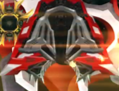
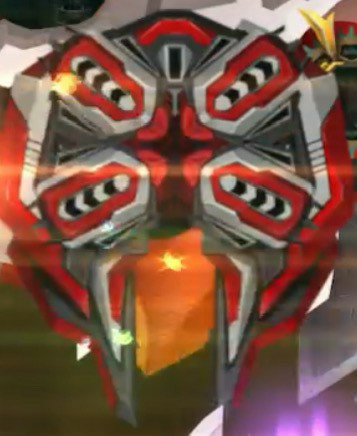
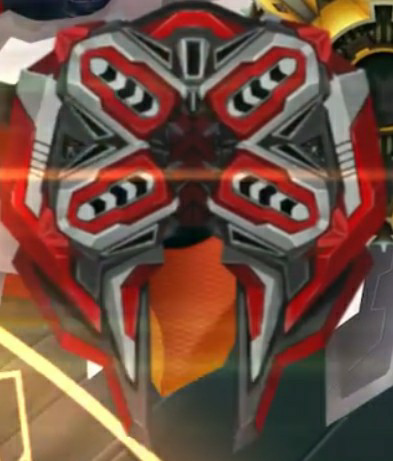
Trivia: Doomsday MIRV's appearance is different from Doomsday Super MIRV. In particular, the sliders are facing exterior for DDM, while interior for DDSM: