
MIRV

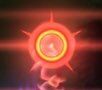
Fireworks bloom in the sky, very beautiful.

There are 3 types of MIRV turrets: launchers, spreads and bloomers. There are also 2 types of MIRVs, pellet MIRVs and laser MIRVs. Laser MIRVs have 2 tiers as well, I will refer T1 laser MIRVs as those that fire off 5 lasers, and T2 laser MIRVs as those that fire off 9 lasers (assuming each laser starts from the point of MIRV explosion).

  • 圆锥曲线: It will definitely be a lot more interesting if you add the exploding sound effect "Boom~" to it.

Tiers and Patterns - MIRV Launchers

  • Tier 1 (Figure 1): Fires 1 MIRV (bullet or T1 laser) forward each time
  • Tier 2 (Figure 2): Fires 1 T2 laser MIRV or 2 bullet MIRVs forward each time
  • Tier 3 (Figure 3): Fires 2 T2 laser MIRVs or 4 bullet MIRVs forward each time, scattering to both sides.
  • Tier 4 (Figure 4): Fires 3 T2 laser MIRVs or 6 bullet MIRVs forward each time, scattering in three directions.

Pellet MIRVs are regarded as the most annoying in this game. This is because pellets are released in all directions, and multiple MIRVs exploding means pellets start to become shurikens - it becomes difficult to quickly determine where each pellet is going with so many bullets on screen. With 30 pellets being released in all directions, the screen quickly becomes flooded with bullets even with just a few MIRV explosions. The second most annoying part about MIRVs is they are 2 stage bullets, and they are deadly in both stages (yes, you can die from colliding with an MIRV directly, even without it exploding), before exploding and after exploding. Before exploding, they are menace on the field and pose a fear in many players, even among veterans. As they only explode only when you are within a certain threshold distance of them, it is sometimes scary because you can sometimes not know exactly when they are going to explode. After exploding, the pellet mess and bullet flooding makes MIRVs so deadly.

The only tactic for pellet MIRVs is to approach them as early as possible. This allows the pellets released from the MIRVs to spread out and thus be easier to dodge between pellets from the MIRV itself, as well as other pellets released from other MIRVs and just all the other bullets around. For MIRV Bloomers, the same also applies. However, even as I say to approach them as early as possible, do not stand point blank in front of an MIRV launcher, spread or bloomers as MIRVs need a short time after being produced before they are ready to explode. The other technique is to mass activate MIRVs in batches. This allows for a push forward then retreat strategy, where the push forward activates them all, and then retreating to dodge through the pellets. This applies to all types of MIRV turrets, particularly for bloomers where many new players get scared off by the sheer amount of MIRVs that get released.

For MIRV Spreads, a good idea is to activate them from left to right in quick succession. The pattern produced by the released pellets in this fashion make a rather large hole in one of the spacing between 2 pellets when done right.

The best defence against pellet MIRVs is TP. For MIRV Launchers and Spreads, simply teleport right onto the MIRVs to delete them. For MIRV Spreads, you do not need to worry about the initial time before the MIRVs become ready to explode, just teleport right after they are released. For MIRV Bloomers, employ the same push forward then retreat strategy, except that you don't push forward, you instead teleport forward to the MIRV wavefront to delete as many MIRVs as possible before retreating. BEMP is the next best option against MIRVs since it completely disregards how many bullets are there on screen, so whether the MIRV is exploded or not, it will get eliminated. Even the smallest BEMPs can get you out of a mess of pellets released by MIRVs.

Barrier is quite a good defence against MIRVs. You can deploy barriers in such a way that the MIRVs are outside the outer edge of the barriers, so that they hit the barrier and you are safe inside the barrier. However, bear in mind MIRVs cause more damage to barriers than normal bullets, so it will not last long, and you should be deploying small barrier, and not large ones. Otherwise, you are not taking advantage of the Phase Out time of barrier that are still able to block off MIRVs. This works well in MIRV/Shuriken missions as all the bullets are roughly the same speed, but in other generic mission types, there are so many bullets of different speeds in that barriers are no longer effective in blocking out MIRVs alone.

While it sounds like PD is a good defence against MIRVs on paper due to its ult that deletes MIRVs with only one PD laser, the fact is, there are so many other bullets around MIRVs, and every other type of bullet travels faster than MIRVs (even shurikens!), in that it becomes very difficult to use PD against MIRVs. However, there are times when the field is mostly clear of bullets except a few remaining bullets, where PD becomes very helpful and triumphs all other defensive options. This happens mostly when there is a Vulture right in front of you (whether is it a frontline Vulture or the only surviving invader on field left) which has only MIRV turrets, which is quite a rare occurrence. Phalanxes work quite well against MIRVs as you can push your way out of a wall of pellets created by multiple exploding MIRVs, but if there are too many bullets around, you are eventually going to run out of Phalanxes.

For laser MIRVs, the same strategy also applies as pellet MIRVs. The mass activation of laser MIRVs is even more important as activating MIRVs one by one is equivalent to having many off sync lasers which will make dodging of tracking lasers (together with other bullets) even more difficult. However, since there is a delay time between the laser MIRV exploding and the lasers actually being active (turning red), you should be even more brave and try to clear the entire field of laser MIRVs, even while some of the MIRVs are already activated/exploded. Just be quick to find a safe spot to hide in after activating them all.

Unlike pellet MIRVs, there is almost no good defensive options against laser MIRVs other than to dodge between their emitted lasers. It is near impossible to eliminate the lasers emitted by laser MIRVs by TP-ing on top of them as that does not work. Barriers work, but be very careful not to activate them otherwise they will deal enormous damage to your barrier, which can be very difficult if you have a small barrier. Furthermore, if you are deploying a large barrier, you should be taking advantage of the inner lining, which can be done at the start of a wave and only lasts so long. PD continues to suffer the same problem stated previously. Phalanxes don't really stand a chance against laser MIRVs due to the other bullets and tracking lasers around. Thankfully, there is a reasonable response time between activating/exploding laser MIRVs and the lasers actually firing.

Trivia: Aside from laser and pellet MIRVs, there was apparently supposed to be a dart MIRV as well, which fired 24 singular darts in all directions. However, it never got past the testing stage. You can see it here:

Trivia: T1 and T2 laser MIRV have different appearances, T1 has 5 tentacles while T2 has 9.

Caged MIRV

Caged MIRV only appear in gold ranks and above, in other words, Colonel rank and upwards. You will not find them on Captain rank and below even though the mission for that day is supposed to contain Caged MIRV.

Despite behaving similar to an MIRV, it should not be treated as the same way as an MIRV, thus the strategies for MIRVs are not as relevant for Caged MIRV. The difference between an MIRV and an MIRV Deathonator is that you are largely, unable to control the detonation time and thus, Caged MIRV may not activate as early as you desire.

It is easy for one to say to kill these Sparrows equipped with Caged MIRV as quickly as possible. However, given the rapid movement of Sparrows, and how Sparrows can hide behind other invaders (including other Sparrows), it is not an easy task.

There are several effective means against Caged MIRV. In general, an Aura or Zen that does both damage and provides bullet clearance render Caged MIRV non-existent, as the Sparrows would be destroyed and the released pellets from Caged MIRV would be simultaneously eliminated. This renders REMP the best option against these Sparrows. However, while it seems straightforward to simply throw yourself into the thick of the action to release an REMP, you have to be careful of what is the next wave. REMP has a slow cooldown and finishing off the current wave with these Sparrows too quickly will pose a problem if the next wave is a very dense wave, which is ideal for another REMP. Thus, if the wave with these Caged MIRV is a light wave and the next wave is a dense wave, you should not use REMP and instead destroy them with other means. A Destructive BEMP also works in the same way and does not suffer the same problem as REMP since BEMP is quick to refill, making it the best counter. While ML certainly eliminates these Sparrows and leaves with no trace of the pellets, using ML just against these Sparrows is a pure waste of damage and should not be done unless the wave is sufficiently heavy.

The next best solution is PD. Using PD does not deplete the Aura completely, which is very vital unless you have a means of AoE damage. This is because without a form of AoE damage, the Caged MIRV will go off a few by few at a time, making one-time Aura usage less useful, such as BEMP (without its Destructive Wave apex, of course). On the contrary, PD is able to keep up with eliminating wave after wave of pellets released by Caged MIRV.

VL is sometimes able to completely eliminate pellets from some of the Caged MIRV if aimed right, but most of the time one side of pellets will still leak. Double Lance has a higher chance to eliminate more pellets, but don't rely on VL. However, VL can be used to cut through the pellets released by Caged MIRV by performing a Vorpal Ride, following the VL as it fires forward. Another semi-effective solution is to use PS. If the next wave does not feature heavy lasers, you can activate PS and then Phase Out through these pellets so that you can clear a good amount of these annoying randomly scattered pellets.

Otherwise, the best advice would be to stay a distance away from these Sparrows. The Aura with the biggest problem would be SEMP, as it destroys these Sparrows all at once and creates an ultimate mess on the field. With SEMP, you should now take caution not to use SEMP on a pure Sparrow wave (that has these Caged MIRV). Alternatively, carefully launch SEMP at the very corner of the screen so that you would still leave a few Sparrows alive, preferably 4-6 Sparrows. Basically, your aim is to disperse the pellets released such that at least the center field is clear of bullets.

In a wave with a Roc, it is completely fine to mass eliminate all the Sparrows at once using some form of AoE damage, since the welcoming party either features mass tons of Sparrows with very few other invaders, or there are hardly these Sparrows at all. After that, you will still have some time to navigate through the mess of pellets left behind, which even gives you enough chance to charge ML if required. When using an AoE form of damage without a form of bullet clear, try not to charge upfield as dodging the pellets released from on top is extremely difficult, compared to when you use it at the bottom of the screen.

Super MIRV

Super MIRV currently only appears in commanders, and may be implemented in all golden leagues and marshal in the future.

The Super MIRV is produced by a turret similar to Doomsday MIRV, which produces one giant MIRV at a time. When you get close to it, this huge MIRV will split into 14 smaller MIRVs, and then the ordinary MIRV can explode into 30 bullets again, which is as annoying as a cluster bomb.

The currently known information is that the mother bomb (Super MIRV) itself cannot be cleared by a ult-level point defense laser, and can only be eliminated by other bullet-clearing skills (including ult-level Teleport's arrival EMP. But there is no conclusion yet on Point Defense's Bullet EMP laser APEX's effectiveness). Predictably, the Super MIRV can be thought of as a moving MIRV bloomer, with the later it is activated, the easier it is for bullets to gather in the lower half of the screen. Therefore, when the super MIRV appears, either activate it for a split second or don't get any closer until it flies off the screen.

Tiers and Patterns - MIRV Bloomers

  • Tier 0 (Figure 1): Fire 6 MIRVs (bullets or Tier 1 laser) in all directions each time
  • Tier 1 (Figure 1): Fire 8 MIRVs (bullets or Tier 1 laser) in all directions each time
  • Tier 2 (Figure 2): Each time, 10 Tier 1 laser MIRVs or 12 bullet MIRVs are fired in all directions.
  • Tier 3 (Figure 3): Each time, 16 Tier 2 laser MIRVs or 20 bullet MIRVs are fired in all directions.
  • Tier 4 (Figure 4): Each time, 20 Tier 2 laser MIRVs or 30 bullet MIRVs are fired in all directions.

The MIRV Bloomer is a very threatening turret, sometimes even more impactful than the Doomsday turrets. They will shoot a large number of MIRVs at once, surrounding and blocking you. When you face a MIRV Bloomer, it is best not to activate the MIRVs one by one, but to activate a large number of MIRVs at once and then dodge.

For laser MIRVs, what you have to do is to activate as many as possible, and then find gaps in the laser array to avoid these lasers. This can effectively avoid the continuous blockage caused by activating the laser MIRVs one by one, and can also bring you a certain amount of energy. It should also be noted that these lasers can be reflected by the Personal Shield. The shield should be used at the intersection of multiple lasers, preferably where the laser MIRV is activated (this is equivalent to reflecting 5 or 9 lasers at a time).

For bullet MIRVs, especially Tier 3 or 4 MIRVs, if you are using Bullet EMP, be sure to learn to graze between the MIRVs. This is the most basic grazing action, which gives your energy, clearing all bullets on the screen at once, and resets all turrets. If your aura is not Bullet EMP, be careful, because you must have very solid dodging skills to get through a barrage composed of a large number of pellets.