Shurikens
Are you having loose bowels? How can you poop so much?
Shurikens are cross-shaped bullets (like a sprayer) that are shot at high speed and then stay on the field at a very slow speed (slower than pellets) to block your path. There are three types of shuriken turrets: ordinary ones, regular ones (shuriken tide), and shuriken spinners.
- No2oMe: Please, stop blocking the damn path.
Tiers and Patterns - Ordinary Shurikens


- Tier 0 (Figure 1): Will not fire bullets immediately, but will spray 2 shurikens forward after a short period of time.
- Tier 1 (Figure 1): Fire 5 shurikens continuously each time.
- Tier 2 (Figure 2): 5 groups of side-by-side shurikens are fired continuously each time, each group has 2 shurikens, and the gap in the middle is narrow.
-
- This is also an even-numbered sniper. Don’t forget how you dodge the even-numbered dart.
- Tier 3 (Figure 3): 12 groups of side-by-side shurikens are fired continuously each time, each group has 2 shurikens, the gap in the middle is wide, and the direction of each shuriken is offset.
- Tier 4 (Figure 4): 18 groups of side-by-side shurikens are fired continuously each time, each group has 4 shurikens, the gap in the middle is narrow, and the direction of each shuriken is offset.
-
- This is also an even-numbered sniper. Please consider how to exploit this feature at some point.
While it is possible to stay completely still and let T2~T4 shuriken launchers lock on perfectly onto you and both the shuriken lanes will pass by your core, it is a completely impractical strategy due to the slower tracking speed of shuriken launchers. Thus, do not try this, but it can be quite fun for you to actually do so when you are bored.
Tiers and Patterns - Shuriken Tides


- Tier 1 (Figure 1): After a period of charging, it will spray an arc consisting of 5 shurikens.
- Tier 2 (Figure 2): After charging for a period of time, it will spray 2 arcs, each composed of 5 shurikens.
- Tier 3 (Figure 3): After charging for a period of time, 6 arcs composed of 5 shurikens will be sprayed out at the same time. The two arcs in the front and back are in opposite directions.
-
- The disgusting thing about this turret is that the charging time for a period of time can also be zero.
- Tier 4 (Figure 4): After a period of charging, three wavy shurikens will be sprayed out. Each wave consists of 7 shurikens on the left and right.
-
- This is where the Shuriken Tide got its name. Depending on the mark, 1 to 5 waves will be sprayed at a time.
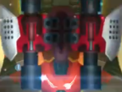
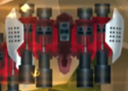
These shuriken launchers appear identical to the shuriken (forward scattering) launchers, but instead of silver rims, they have golden rims. These patterned shuriken launchers track much faster than shuriken (forward scattering) launcher counterparts. They track at about the same speed as boomerang turrets, if not, faster, but slower than dart tracking turrets.
T1 patterned shuriken turrets don't flood the field quickly, hence they are not very deadly.
T2 patterned shuriken turrets can get annoying fast because they spread out the cluster of shurikens into 2 sections instead of one from its T2 forward scattering counterpart. Furthermore, because they track fast, they have the capability to spread shurikens in 2 wide arcs by tracking your movement. The random movement of invaders make it all the worse, making these shurikens being shot out in 2 mostly straight lines terribly difficult. If you are not faced with other tracking turrets, try not to make rapid movements to align these shurikens in straighter lines.
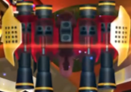
Strangely, while a T4 patterned shuriken turret also exist (as explained later), these T3 turrets are actually the most dangerous turrets. This is because you are left with no choice but to dodge between 2 arcs of shurikens, usually necessitating a zig-zag navigation, which is extremely difficult. Otherwise, you will have break a hole in the pattern by using BEMP or Phalanx. The final alternative is to squeeze between the arcs, but you will need to do so twice, which is very difficult.
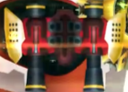
As shown in the picture below, it is hard not to think of a bad stomach:
In every field and vocation, there emerges a master of discord (sad).
T4 patterned shuriken turrets produce shurikens that look very intimidating since they appear to be simply spreading shurikens everywhere. However, not to worry, as you simply need to stand back at the bottom of the field so that these shuriken turrets can lock onto you. You will find a point in time when there is a small, but clear passageway for you to comfortably traverse. Be careful of other bullets such as MIRVs and pellets even as you traverse this passageway. Darts take up a considerable amount of space and thus going (almost) head on with a dart tracking turret is not a solution. Most of the time however, because it can be difficult to wait such a long time to find a clear passageway, it is more convenient to simply deploy a BEMP or Phalanx to push your way through. However, in the absence of MIRVs and darts, bear in mind you do not always have to waste a BEMP or Phalanx just to get through these shuriken patterns. An Eagle equipped with all 3 T4 patterned shuriken launchers is very possible to find a clear passageway. For T4 patterned shuriken launchers that are on opposite sides of the field, it is usually possible to find a brief moment with a clear gap in the pattern to head towards, and then exit through the arcs. Do not go head on with these T4 turrets as you will have to face the other 2 sets of 2 arcs even as the middle set of arcs is not a problem.
Tiers and Patterns - Shuriken Spinners


- Tier 0 (Figure 1): After a period of charging, 3 shurikens will be sprayed in 8 directions.
- Tier 1 (Figure 1): After a period of charging, 5 shurikens are sprayed in 8 directions.
- Tier 2 (Figure 2): After a period of charging, 9 shurikens will be sprayed in 8 directions.
- Tier 3 (Figure 3): After a period of charging, 13 shurikens will be sprayed in 8 directions.
- Tier 4 (Figure 4): After a period of charging, it will spray 6 groups of shurikens continuously in 8 directions, with every group of 20 shurikens forming a group. After each group of shurikens, it will turn to the opposite direction.