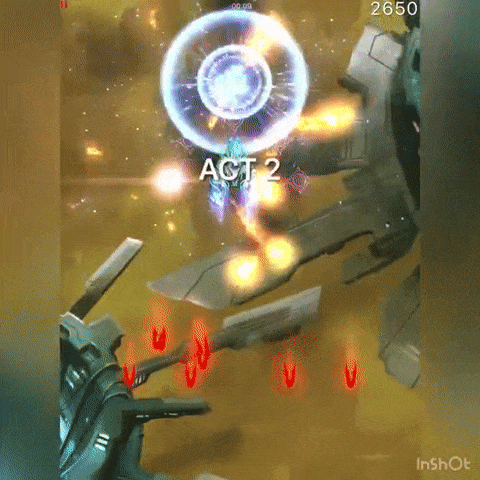
Wraith
Fun main, fun aura, fun zen. What more can you ask for?
Author: Hi(Phase)
Basics
These are kinda unnecessary, but for posterity it's good to include:
- Saving one main cycle roughly translates to 1 saved second
- Almost always bomb X-1 waves (i.e. 1-1, 2-1, etc)
- Unless necessary, never sit at full VL
- Good to remember early mission statistics:
- 1 main crit kills 2 Ravens and 2 sparrows + 1 Raven
- 2 main crits kill Eagle
- 1 main crit + VL kills Eagle
- Raven + sparrows (either 2, 4, or more) should always expect 2 bursts
- Herons always require 2 bursts or VL + 1 burst
- Waves with high sparrow should require an MB unless you're very confident
- See section 2 of VL for examples of VL sweeps on sparrow waves
- Always try to fire VL off immediately so you don't have to worry about invader RNG
Play Styles
The ship is fundamentally very mechanical; as a result, wasting 1 VL early on (like in act 1-2 for example) will come back to punish you later when you need that extra VL. Unlike other speedrunning ships (Shogun, Proxy, Kiba), I find that one small mistake is typically unrecoverable, and thus I immediately quit runs if even a single main sweep fails.
Additionally, the ship has extremely low variance, so getting good runs are extremely consistent. This may depend on the play style, but I personally like to focus on low risk, consistent plays (such as using VL at the start of the wave to avoid invader movement RNG), and then make up for the potential time saves by betting on main RNG. I find this to be less frustrating and also much easier to consistently perform, but the other option is frequently viable.
In a typical mission, a mix of both strategies may be required. For invader compositions where it's majority low hp enemies in the front (Ravens and Sparrows), it will almost always be an optimal strategy to fire off VLs immediately. If there are high hp enemies in the front (Eagles and Herons), either strategy can be viable depending on the goal. For example, if the backrow consists of 2 Eagles, it is better to immediately fire VL to avoid situations where the Eagles may move apart. However, if the backrow is Ravens, it can be optimal to wait for Ravens to lineup.
Low invader RNG strategy example:
By (attempting) to fire off all VL immediately as the wave arrives, I forego any hope of invaders lining up (such as the frontline Ravens and Herons). Instead, waiting for invaders to line up results in the first main burst being wasted, so I opt for immediate VLs to avoid main downtime.
Low main crit RNG strategies:
In this case, immediately using VL provides no advantage since the front Eagle will require one burst regardless. Instead, it's better to wait for potential raven lineups before firing VLs.
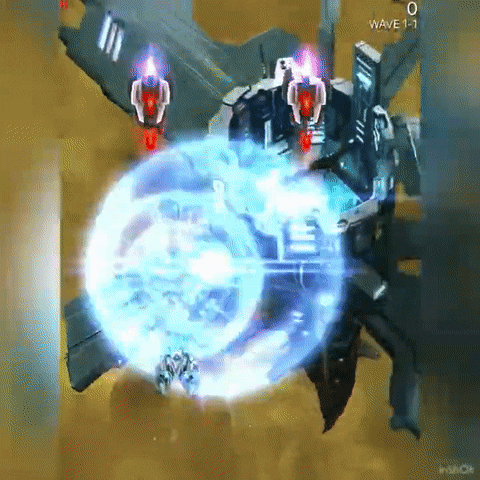
Main
Unlike other crit-based mains like Kibarrax, Wraith is all-or-nothing when it comes to crits. This results in situations (like those mentioned in basics), where you can save a full second based on whether the main crits or doesn't crit.
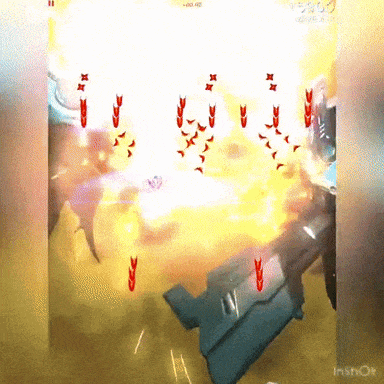
Main Reset
Frequently it's good to fire off your main on a prior wave. This allows for your main to be properly cycled on the next wave, allowing for clean sweeps (as seen in the below GIF):
This is commonly seen on 2-2. Instead of saving your main from 2-1 and immediately firing it on 2-2, you can instead fire off a blank main after the 2-1 MB, and then have easy lineups on 2-2. These fall under low invader RNG strategies.
Note that it is occasionally viable to not cycle main on X-1 (i.e. start charging MB to conserve main immediately after X-1 MB) and then use the main before the VL. This strategy is frequently dependent on invader movement, and only recommended if there are no sparrows (for example, 1 Heron or 2 Ravens). If one does not plan to use VL on X-2, then this would be the recommended approach.
Main Sweep
When there are 3 sparrows, it's always easy to main sweep. When there's 4, it can become rather difficult depending on the configuration. If all 4 fall in a row, it can be inconsistent and depends on whether the outer sparrows move outwards. If it's 4 in a box configuration, then you should wait for the 2 sparrows in a row to split, start from the one that's further out, and then swipe over and stop at the furthest out raven on the other side.
4 sparrows in a row:
4 sparrows in a box configuration:
Main Precharging
I'm not sure if this is the correct term, but the basic idea is to finish off one wave with the main, and utilize the downtime it takes for the main to kill to start charging the MB on the next wave. Depending on the health of what you're trying to kill, you can save up to 400 additional milliseconds (under the assumption it takes a full burst to kill the target invader) of preloading your MB, which can make or break the next wave.
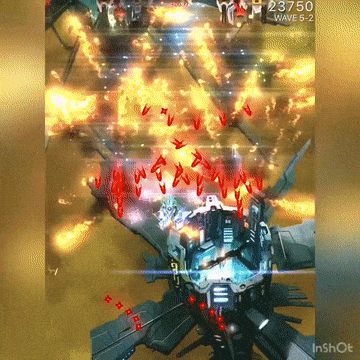
On 5-2, I use 4 lances total (2 down each side), knowing that 2 VL + 1 main (crit or non-crit) is sufficient to kill an Eagle. This allows me to start charging MB for 5-3, and gives me a sufficiently large window to cleanly get the MB off. The additional ~300ms is necessary since otherwise the raven MIRVs can fire, making dodging significantly harder.
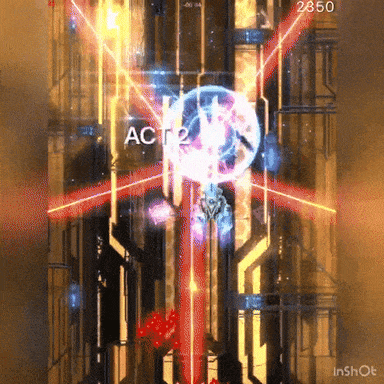
Vorpal Lance
Similar to other VL-based speedrunning ships (Jeria, Exarch), using VL early on in a wave is recommended as that helps avoid RNG incurred by invader movement. This allows for easily replicable speedruns, as the invader positioning from one run to another is typically pretty minor. For more details, we refer readers to the play styles section, and particularly the discussion on low variance approaches (which is typically recommended).
Another important technique is the idea of a "VL sweep", where the player moves from one side of the screen to the other and fires VLs at critical points. Typically, it is best to look for points where the largest number of invaders overlap, while making sure VLs are evenly dispersed.

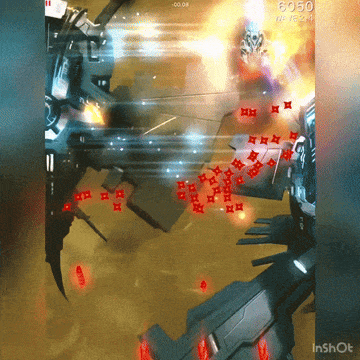
The image above represents one such VL sweep. Each blue line represents a VL (where they were dispersed from left to right) and each numbered green line represents one main burst. Because I swept from left to right, I started with a single main burst that hit the bottom left Heron, before sweeping across and using 4 VL.
Since I am on the right side after sweeping, I'm in position to then use my 2nd main burst to clean up that side (note that I was lucky here; without the crit the wave would not die). Note that if the Heron and Raven on the right side line up, then it's easy to use at least 1 VL down the intersection to not require a lucky main crit.
Finally, since there's a roughly 600 millisecond downtime between each burst, it gives more than enough time to get back on the left and finish the final top left Eagle.
In GIF form, this wave is below.
Another example can be seen below (in both image and GIF form). In this example, the width of a VL is large enough to consistently hit a center Raven along with the raven in outer columns, so there is no need to waste an additional VL solely focused on the center. This allows for the right Heron to be killed instantly.

VL Convergence
In certain situations, the gap between invaders may be too large for immediate VL to hit all enemies (this is common in 3-Eagle setups in Acts 5/6, for example).
There are typically two schools of thought, and the correct answer is dependent on a variety of factors such as number of VL (if you have a high count, there's no need to hope for invader convergence) and ability to MB (if you can use MB/MBc then the dependency on convergence is significantly lessened), along with other small characteristics such as number of sparrows.
As a result, in certain cases it may be beneficial to not immediately use all VLs, instead opting to hope for invader alignment to save time and required number of VLs.
Remark: This strategy is notoriously RNG-dependent, even more than other strategies detailed in this markdown file. I would only recommend it if it's a significant time save and the rest of the mission is very consistent, since saving time elsewhere in the mission will almost always be less painful.
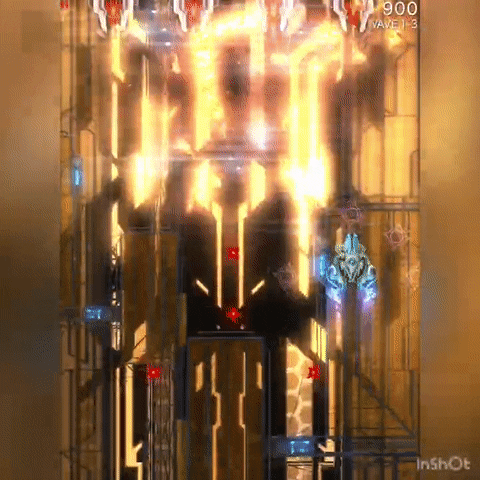
Sparrow VL Sweeps
For these types of waves, a high amount of accuracy is required, particularly to guarantee that the gaps between each VL is small enough to avoid any invaders not getting killed between pairs of VL. Unfortunately, these waves can oftentimes require a high amount of RNG, depending on the exact composition and number of VLs you have.
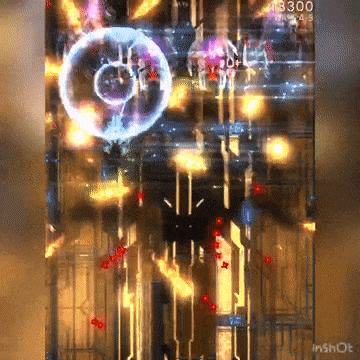
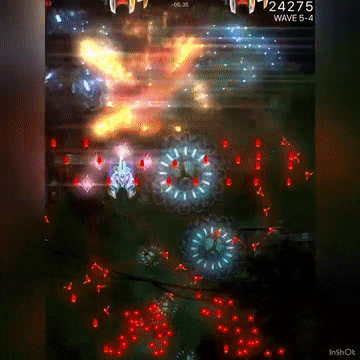
The below wave is "relatively" easy to sweep compared to other invader compositions that are more sparrow-heavy. Because the prior waves (not shown here) was dense with a single high-hp enemy, I chose to use MBs, resulting in a high cooldown entering 5-4.
Looking at the invader composition, there are 2 sparrows on the outside of each side, so I had chosen to use 1 VL to track down each of these sparrows. When you start your sweep, no invaders will have moved, so you can precisely fire the first VL to hit the top left Raven, the Sparrow, and the bottom left Raven. The three remaining VL were divvied up between the remaining enemies, with 2 dedicated to the Heron and one dedicated to the left sparrow (where I then hope the back Raven aligns).
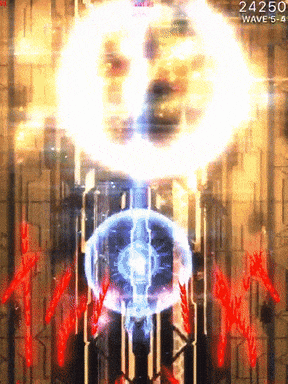
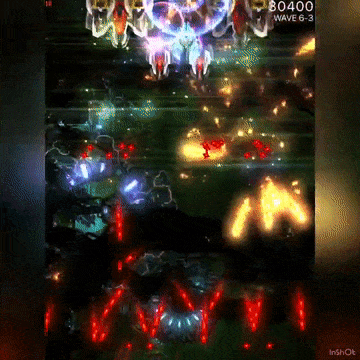
A very similar idea is used here. Since I enter with 5 lances, I try to disperse them symmetrically where each Heron receives 2 VL and then the middle Raven receives the last VL. I mark both of the outermost sparrows with 1 VL, and then another inner VL that targets the inner Raven.
For these types of sweeps, the key is to go fast as to avoid invaders drifting too much, which can lead to uncomfortable situations where VLs completely miss.
Mega Bomb
The most underrated component of Wraith is the importance of MB. It is recommended to never have MB cooldown fully recovered since it typically indicates missed opportunities. For example, the time between entering 3-1 and entering 4-1 is often close to 12 seconds (assuming only a 3-1 MB is used), which is why it is often advantageous to use an additional MB in act 3 (for example, MB on 3-1, 3-2 or 3-1, 3-3).
For general details about MB, I refer users to the Proxymar guide, which covers much of the MB basics.
Now for specific techniques:
While other common speedrunning MB ships (such as Proxymar or Kibarrax) recommend maximizing MBc (mega bomb core) damage, Wraith is a bit different. Because VL benefits most in scenarios where numerous invaders align, it is advantageous to instead MBc only the invaders with the highest hp.
One such case can be seen below, but the more common scenario is the 1 Vulture + 2 Eagle configuration, where (depending on number of VL) it is frequently better to instead use MBc on the highest hp enemy (Vulture), and then allow VLs to cleanup the remaining Eagles. This is particularly common in Community missions, for example.
Additionally, because both VL and Wraith's main fire quickly, it is difficult to pre-charge MBs for the next wave like Proxymar of Kibarrax, both of which benefit from the delay incurred by MS. This can lead to MBs that are positionally disadvantageous (such as being forced to sit lower when charging/firing MB), which is where the Lambda apex is useful. Darts are typically the biggest threat, since they are fast moving and (almost always) perfect tracking, which makes for difficulty finding safe MB positions while still reaching all invaders.
Apexes
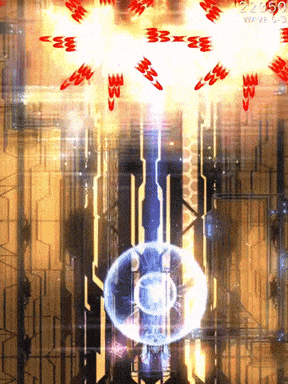
- Gamma: In most situations, Gamma ends up being the better choice. This is because conservation of VL is vital in later acts, and it gives you extra leeway when sitting at 4 VL. However, this does mean certain early-act MBs can be a bit tight.
An example where Gamma Wraith is highly recommended. With only 4 VL consistently landing a sweep where the entire opening party is killed is difficult. Other examples can be found in the "Sparrow VL Sweeps" section, as many of those wave configurations are easier with the additional VL.
- Lambda: I personally prefer this apex (mostly due to aesthetics), since it makes extra early MBs much easier (since you can sit significantly lower and avoid enemy bullets)
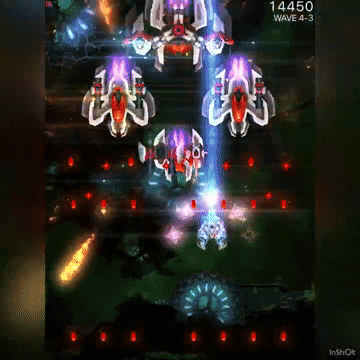
An example where Lambda Wraith would be necessary. Given such a wave configuration, MB is highly recommended due to the sparrows in the back, but the Eagle's tracking pellets make it difficult to find a position where avoiding death is difficult except sitting at the bottom of the screen.