Personal Shield

Activates a shield to defend against any attack from invaders.

Probably the most difficult Zen to use. Generally underpowered but it has its niche uses where in such circumstances, shines above nearly all other Zens. The very long cooldown time means this Zen is really only for the pros.

The details of this skill are listed as follows:

Level12345Ultimate
Max Duration (s)2.52.753.03.253.53.5
Charging Duration (s)0.60.550.50.450.40.4
Charge Time Increase (s)3.02.752.52.2522
Charge Time Recovery (s)Very Slow (8.5)~~~~~
  • Ultimate: Adds Laser Reflection, which deals 10 damage / (laser*second) that hits the PS back to a random target (which may not be the source of the laser).
  • Score: 5.91 / 10
  • Useful Levels: 1, Ult
  • Priority Level: 1 / 8
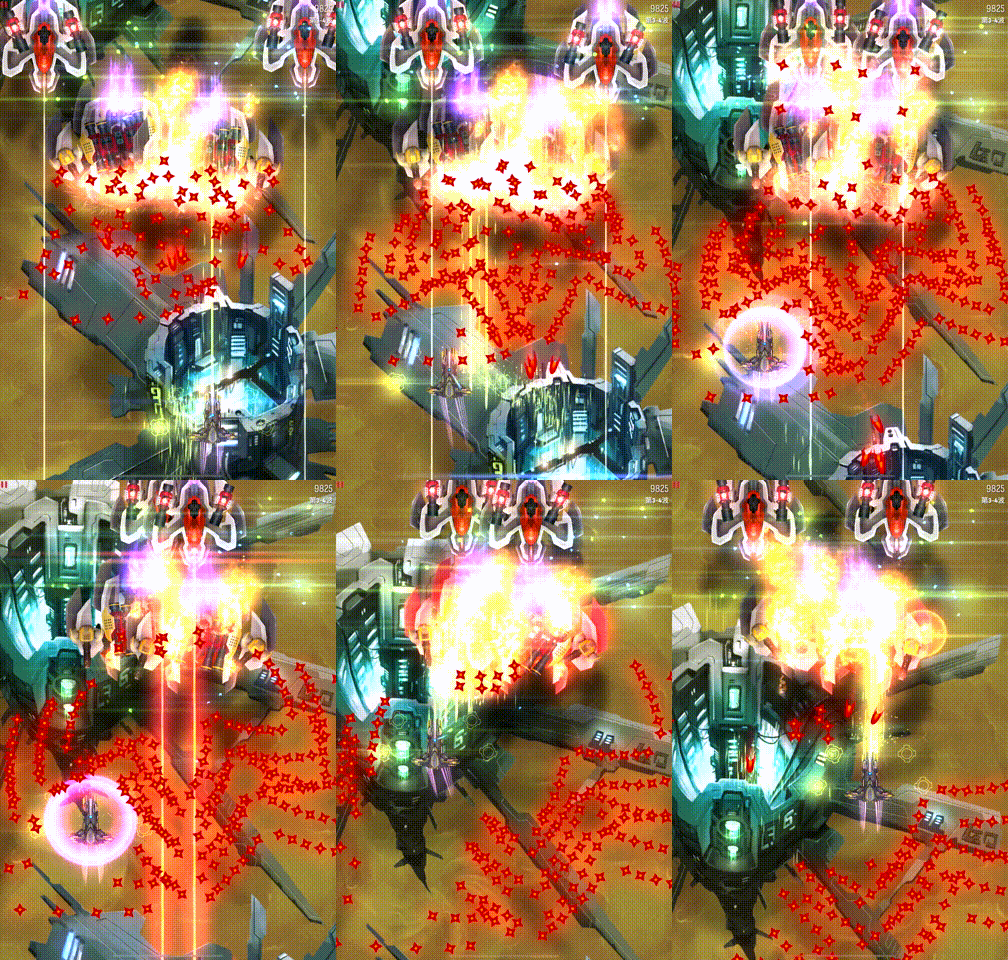
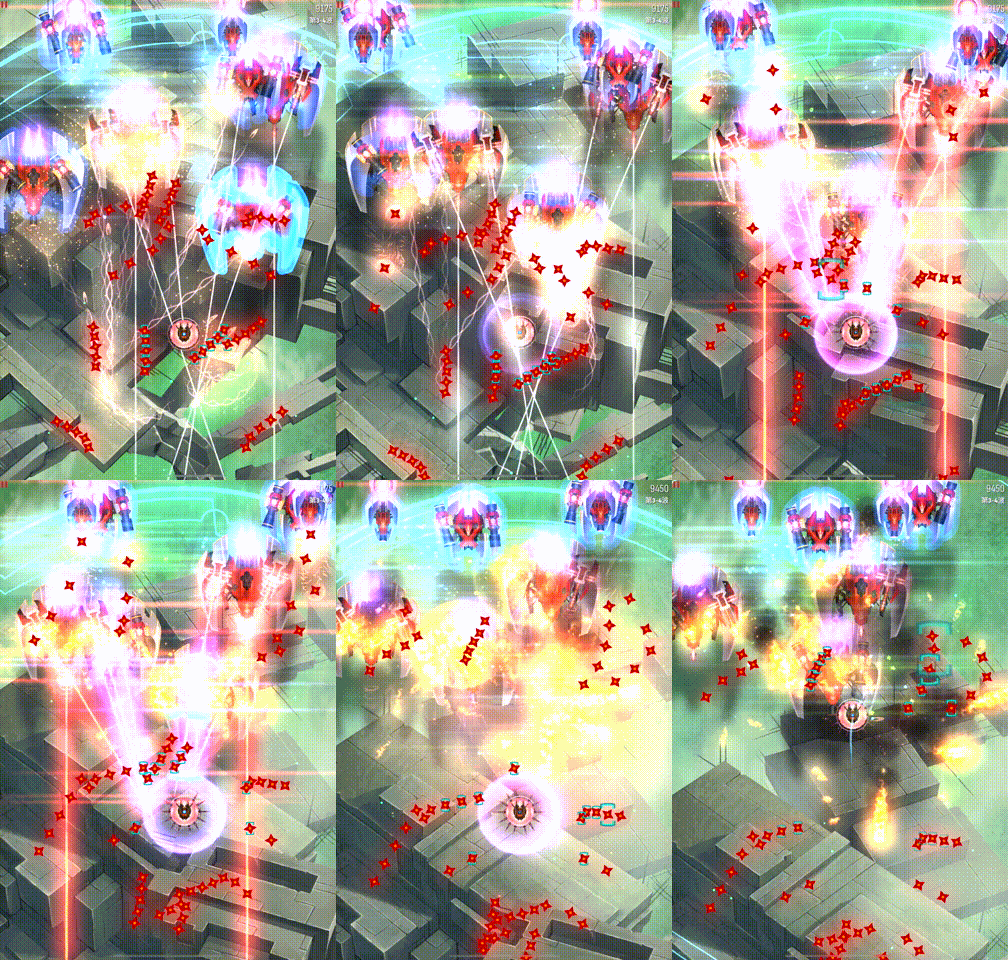
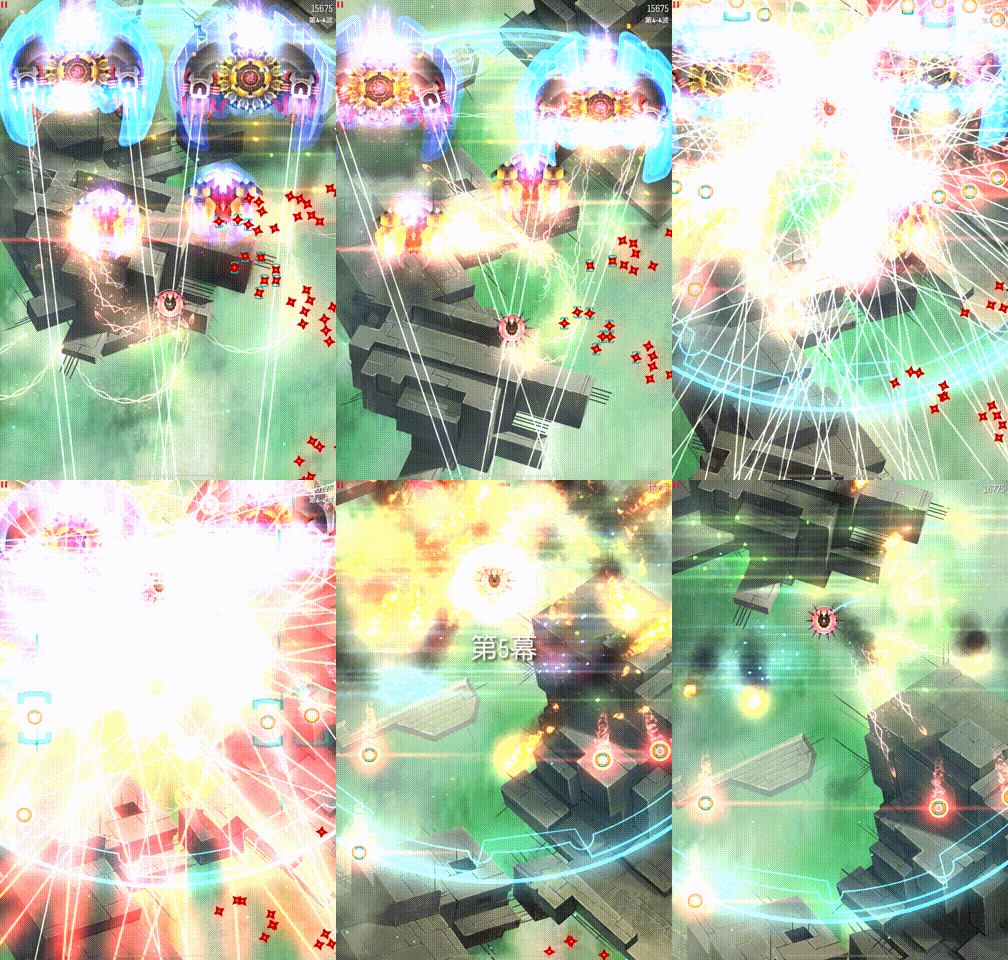
  • Illustration: The fiest one shows you how to defend yourself from assaults; The second one shows that you can reflect lasers to deal damage; The third one shows that you can use PS as an eraser to clear bullets nearby.
Comments

  • Editor: The rickety boat sailed in the sea of bullets.
  • ☀🐕: The defensive aspect of PS is crap when not taking account of laser reflection. Let’s buff it so that the shield persists even after ship moving and firing.

Usage

The utility of PS is quite underrated. Many players think that PS is nothing more than simply being a laser reflector to deal damage back to invaders, or simply just a means of defence against lasers. Many players do not think of the utility of PS against bullets, which while isn't much, it is very useful in dire situations.

The very less known fact about PS is that it has a very tiny Phase Out time, maybe approximately 0.25s. This does not seem like much, but think of it like a Chrono Phase Out time. The Phase Out time of PS is able to cut your way through walls of bullets, particularly shuriken clouds or pellets (whether lanes or simply just being annoying random pellets flooding the field). It is thus of extreme importance to practice the Phase Out of PS in order to maximize the bullet clear it is able to provide, in order to know how much it can clear. As a general guide, it can help you cut through about one-eighth of the screen width. Use this fact to help you cut through walls and position yourself in a better spot either on the offence, or simply to escape the looming death. PS Phase Out is also very useful in dealing against pellets released by MIRV Deathonators, as you can deploy PS for a split second and then push your way past the mess of pellets. Just be careful not to use it when the next wave has enough lasers you can reflect.

While PS is active, gameplay speed is reduced by 25%. This also means that while it is advertised that the Max duration of PS is 3.5s, the actual duration is 4.67s (3.5÷0.75), as the 3.5s refer to in-game time. The rather long duration of PS allows you to have time to decide how long you want to continue staying to block off additional bullets, especially bullets coming from weird directions that are not consistent with the rest of the bullets around it. However, always plan your escape immediately as 4.67s will not feel like a long time and you must quickly Phase Out when the opportunity hits.

The thing about PS is, there is not much purpose for an increased duration. You would seldom use the full duration of PS since it is only used to either cut through bullets, or used to reflect lasers. Neither of which purpose is needed for the full duration since laser bursts only last 1s, while cutting through bullets don't usually require more than what is probably 0.25s. However, the longer duration helps nevertheless, particularly against MIRVs which feature a sudden speed-up in bullets that you want to block off, since MIRVs move slowly and you would sometimes want to get rid of that cluster of MIRVs before being safe to exit.

Another useful function is to block off more than one barrage of invader weaponry, particularly, against both lasers and boomerangs which usually come in separate bursts. As a completely invincible shield, PS is one of the best tools against boomerangs since it can last through the entire burst of boomerangs without running into extra risk. Just bear in mind don't attempt to hold out PS for 2 bursts of boomerangs, because it's not long enough to do that even at max level.

As a last minute defence it works very well since it's quick to charge, but once again, like TP, it is not instant, so be sure not to do it very last minute when a bullet is right up your core. The upgrades in level slightly decrease the level of pre-emption, but honestly, it's not anythign very significant.

PS works very well with burst mains as well as LS, as the both would continue to deal damage, making your exit slightly safer from the destruction of some invaders or turrets.

Because of the Very Slow Recovery of PS, it is usually not used in light waves. PS will usually see usage once per medium wave, as well as heavy or dense waves. In very heavy waves, or dense and heavy waves, PS can be used twice.

Upgraded to the ult level, it is pretty self explanatory how to use it. Simply use it to block off lasers when lasers are present. However, it is not always beneficial to block off lasers if the laser density is sparse. As a general guide, if there are still more than 6 lasers that are going to be fired in one burst, PS should benefit. If not, it is better to simply dodge them and use your main to deal more damage and kill the invaders off faster, unless you are really cornered with no other means of escape. As an extra note, this is not to say that a non-ult PS is useless against lasers. In fact, it is the contrary as it is pretty much the only reliable tool against lasers in desperate times where your Aura may not be big enough to cover all laser turrets. Of course though, the utility of PS against lasers is much more useful when ult-ed.

PS can also be used to effectively block off DDLs. Take note that normal lasers will fire first before DDLs do. However, the duration of an ult PS is just long enough to last through both the initial normal laser burst and the DDL. If the entire PS isn't within the DDL, it is even possible to Phase Out away from the DDL if you think it won't last.

APEX 1: Supersize

  • Game Description: Aegis amplifiers create an extra large Personal Shield.
  • Numeric Interpretation: The size of the Personal Shield is increased by 50%.
  • Score: 2.00 / 5
  • Ships with the APEX: Atlas (Alpha), Lokie (Alpha), NC-271 (Beta), Phoenix (Beta), Zhetass (Gamma)

Editor: Is it big enough? Still not big? What are you thinking?

This apex increases the diameter by 50%.

This apex is actually very useful, and ships with this apex are generally quite cheap to purchase, which makes this apex generally a worthwhile investment. The most obvious buff is the fact you can potentially reflect more lasers since the area of laser catch is much wider. This usually makes for much larger reflection damage compared to normal PS since some T1 low Mk lasers that have poor tracking ability may not be able to target your core in time.

But the second more useful and less obvious buff is the fact that the supersize PS can clear a lot more bullets than normal PS. The increase in size also means you can clear away much more space and open up more pathways for you to escape after exiting PS. Combined with the Phase Out time of PS, where the bigger Phase Out PS can clear even more bullets, this apex actually turns PS into a viable bullet defense, increasing the survivability of the ships with this apex against bullets.

APEX 2: Super Reflect

  • Game Description: Split-second shield activation just before laser firing will reflect back with extra force.
  • Numeric Interpretation: The lasers hitting the shield at the first 0.5s will be reflected back with 5x damage.
  • Score: 4.18 / 5
  • Ships with the APEX: Essin (Gamma), NC-150 (Beta), Njorun (Gamma), Torrent (Beta), Widget (Delta)

Editor: One for five at the limit.

This apex allows PS to deal 5 times the normal Laser Reflection damage, but only for a very short initial activation duration which only lasts for roughly 0.5s. An hexagon shaped PS indicates this duration, and lasers reflected during this duration will have an extra large width, although they suffer the same random targeting nature. As a reference, 8 laser super reflected (with a bit of prior damage to the Shield with a 34.375 DPS SB weapon) instantly destroys a Shield Roc.

Who doesn't welcome some SERIOUS extra damage right? With quite a bit of practice, you will be able to identify the correct timing to release your touch such that the lasers will hit your hexagon shaped PS to deal extra laser reflect damage. The super reflected lasers still suffer from the random targeting nature, thus it is possible that not all invaders may die even with many lasers on field, but for sure the bigger invaders will go down.

This apex is the most useful against the boss invaders (Condors and Rocs) as lasers from these invaders either heavily damage or completely decimate these invaders. Never again will you have to face such a difficult boss invader filled with both lasers and insane bullet spinners. Just beware of the next wave after such boss invader waves because they can be very deadly and you will not have enough time for PS to recover to reflect the next wave of lasers. This is especially useful against very heavy waves, particularly 5-4 in daily missions.

However, for most other waves, this apex is generally not very useful as it is difficult to reflect lasers from upfield invaders to hit frontline invaders. It is more efficient to use an Aura which refills very quickly, particularly in dense waves. The slow recovery rate of PS also make this apex slightly harder to use, and best reserved only for heavy waves.

Because community and specialist missions significantly less amount of lasers, the effects of this apex is difficult to feel, but it may have some effect in General/Dart missions.

APEX 3: Focus

  • Game Description: Focused interconnects charge Personal Shield faster and recover it more quickly.
  • Numeric Interpretation: The charge time decreases from 0.4s to 0.3s, the recovery time decreases from 6.5s to 4.5s.
  • Score: 2.27 / 5
  • Ships with the APEX: Gorthaur (Alpha), Jericho (Gamma), Zhetass (Beta)

Editor: Just afraid of not concentrating enough and forgetting to activate the shield.

This apex makes the recovery rate of PS much faster, allowing PS to completely cool down (charge time returns to the initial state of 0.4s) after 4s (assuming it was used once after PS has completely cooled down), which is faster than REMP (6s).

This apex turns PS ships with the apex into much more survivable ships due to the better capability to spam PS. It appears that in long waves, such as Act 5 of S+ leagues, you can even use it twice in such waves. Many PS ships do not have a very high survivability rating in the Tier List, and this apex pushes their survivability rating up by at least 1 minor grade (taking into account +/-). This apex is also generally very cheap.

APEX 4: Shield Booster

  • Game Description: A custom booster extends the protextion after the shield expires.
  • Numeric Interpretation: An additional Phase-Out time of 1s is added.
  • Score: 1.55 / 5
  • Ships with the APEX: Centurion (Epsilon)

Editor: Finally, did you discover it? Personal shields are essentially erasers.

Simply put, when you press your finger back on the screen to control the ship, a regular shield will disappear in a short time, while this APEX allows the shield to last one more second. Perhaps you know that the Personal Shield itself has the function of an eraser; as long as you slide your finger forward while pressing back on the screen, the shield can break through more bullets. This use of the eraser is applicable in many missions.

However, it will have a certain impact on the main weapon because during the time when the shield has not disappeared, the main weapon seems not to attack, meaning the rhythm of the attack will be disrupted to some extent, which is not good news. Overall, the application range of this APEX is not particularly wide. For Centurion, you can completely choose another APEX to start with, or simply use the base form.