Vorpal Lance

Shoot a piercing lance that hit all the invaders in the line.

Easy and straightforward to use offensive Aura. Easily recommendable for all players. Potential to deal devastating damage when utilized to maximum effect. Slightly annoying at times due to RNG at play, plays quite a big factor when speedrunning. Very meta in daily missions.

The details of this skill are listed as follows:

Level12345Ultimate
Damage3334.6536.337.9539.639.6
Counters233444
  • Ultimate: Allows the fired VL projectile itself to clear bullets as it travels forward.
  • Score: 9.18 / 10
  • Useful Levels: 2, 5, (sometimes Ult)
  • Priority Level: 2 / 8
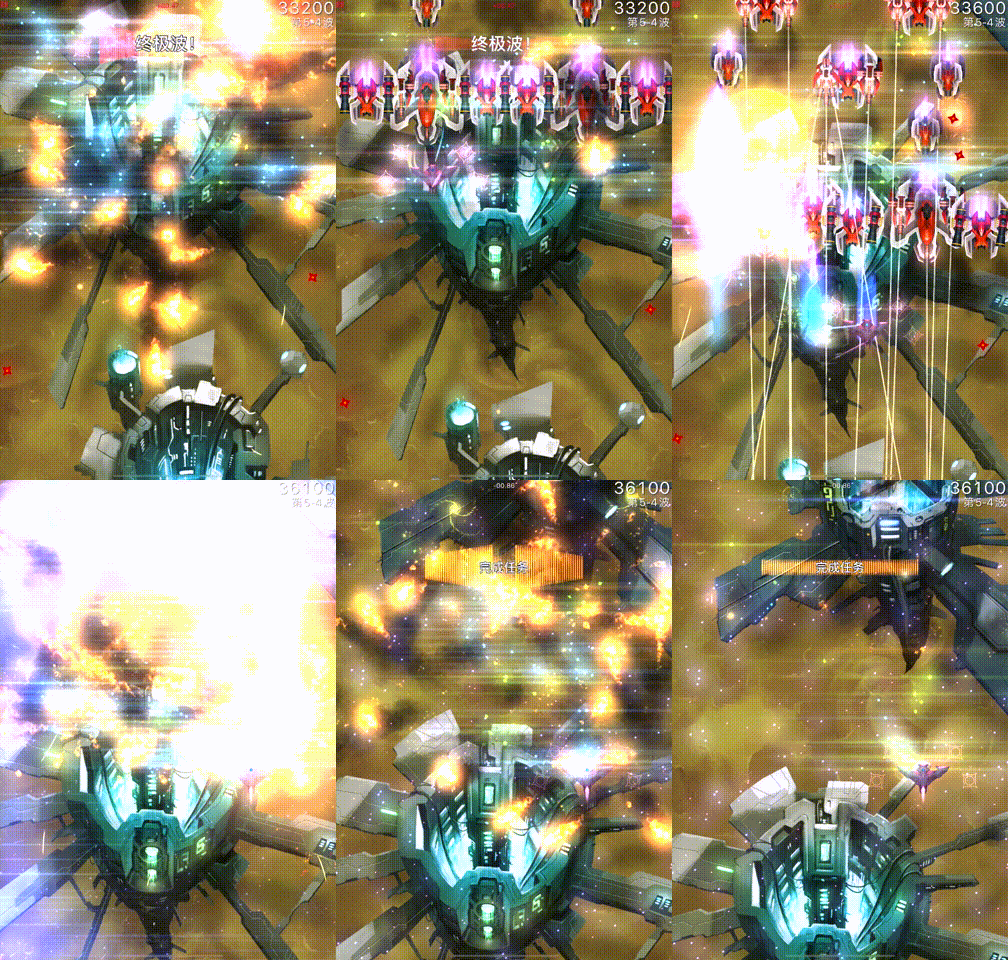
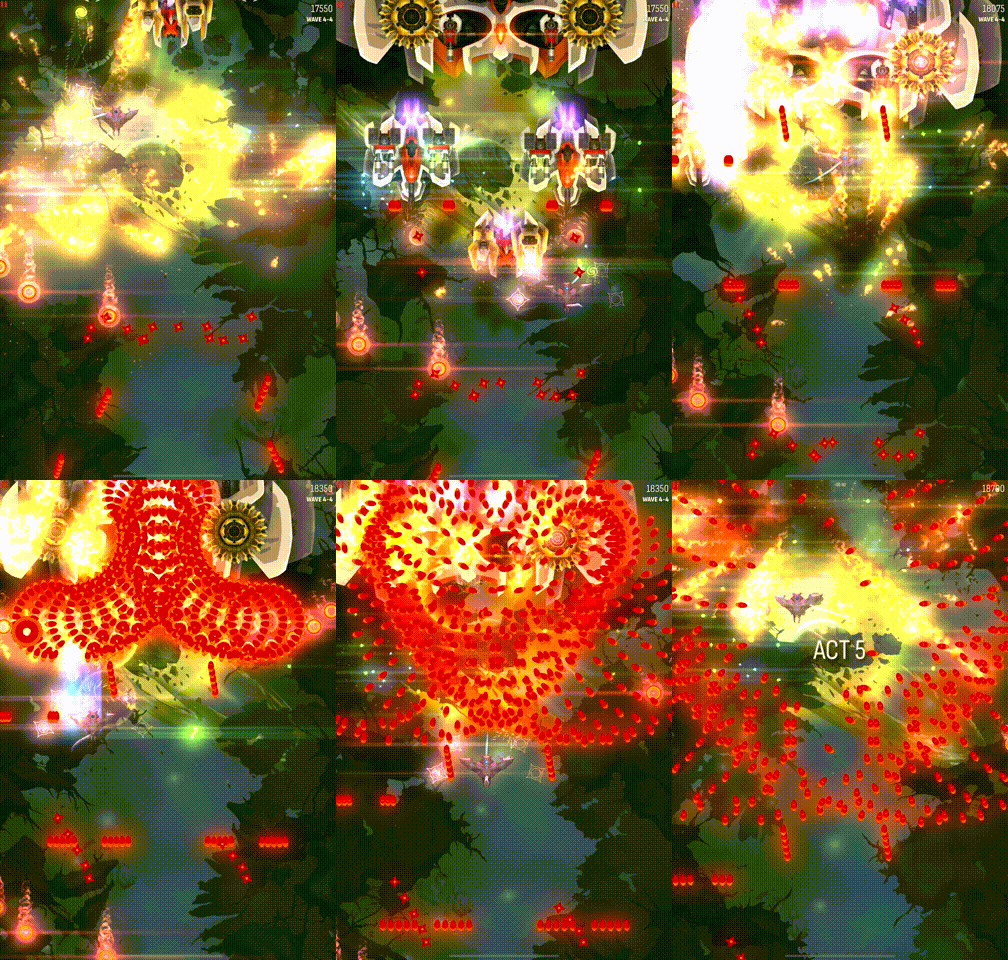
  • Illustration: The first one shows that it can hit the back invader; The second one shows how to clear bullets.
Comments

  • Editor: It's useless to hide behind, bro.
  • ☀🐕: With both offensive and defensive capabilities, VL really is the best all-round Aura, boasting extreme effectiveness against crowded groups of enemies. Though not as good when soloing high HP enemies. And grinding for RNG is somewhat frustrating.
  • Hank: An ult VL is a Sudden Spurt of a Salted Fish!

Usage

Despite being of priority level 2, it is extremely important to upgrade VL to level 2 first before upgrading the Zen further beyond level 1 if it is an AP ship. This not only adds an additional counter to VL, but the upgrade means a VL can instantly kill any affinity of Ravens, which is extremely valuable, especially when crowds of Ravens can be very common. The utility of VL is about the same for Level 2 and onwards.

VL is generally very straightforward in usage. See a column of several invaders? Yeah, just throw in a VL. Basically, use it opportunistically. However, do not hesitate to use it. You do not need to wait for a perfect line-up to use VL. So long there are more than 3 invaders in that line (if Ravens are present), you can throw a VL already. Do not wait for Sparrows to line up as there is no point since they can easily escape your VL due to their rapid movement and their small size. In fact, don't use VL on Sparrows unless the wave is purely Sparrows. You do not need to wait for the larger upfield invaders to arrive before you start throwing VLs at the Ravens and Sparrows in front. Generally do not use VLs on larger invaders like Herons unless there are several other invaders behind it, unless there is not much in the wave other than these larger invaders. As a general guide, using 2 VLs in Act 4 and above per wave is fine. As an offensive Aura, it is your job to keep the field clean before the invaders can overwhelm you.

If there are too many Ravens on field at once (4 columns of them) and you have 3 or more VLs, you can perform a lance sweep, simply throwing VLs out at equally spaced horizontal distances to eliminate as much as you can. It is usually not sensible to throw away 4 VLs in a single wave, unless all the Ravens are hiding behind a Vulture (or 2 Eagles). 3 VLs are usually enough to eliminate most of the threat.

VL is an absolute pleasure to use in very dense waves. It is in fact the most powerful offensive aura in daily missions. Once you see such waves, you can happily throw down 3 - 4 VLs, spread out evenly from left to right, and poof, pretty much everything is gone. Even for dense and heavy waves, the size of larger invaders make them very vulnerable to multiple VLs, making them very weak or completely obliterating them. The huge size of an Eagle for example, will usually eat at least 2 VLs, when 3 VLs is sufficient to take it down. VLs should not be stockpiled during dense or heavy waves, but exhausted to the point where at least one side of the field is almost clear of all invaders (leaving either only 1 Raven or some Sparrows). For light waves, a maximum of 2 VLs should be used, while it is recommended to use 1 unless you don't have enough spare particles on field and are running low on VL supply. This is to get rid of one side of the light wave to allow you to collect particles leftover from a dense and/or heavy wave.

Due to the fact that VL can reach upfield invaders hiding behind other invaders, it is extremely useful is reducing the threat very efficiently, particularly when crowds of Ravens behind can quickly overwhelm you with so many turrets. Upfield larger invaders can also be disarmed easily by sniping out their dangerous turrets, such as those on Eagles and Vultures.

For certain ships, where the main weapon is not a very good turret popper, VL is able to make up for that function. Furthermore, this function does not interfere very much with its Raven clearing capabilities since it is still likely that you will be able to catch invaders behind even though you specifically target the turret on an invader Eagle or larger. This function is very useful especially on upfield Eagles with deadly middle turrets as well. However, it takes more than 1 VL to pop off a turret on an armor Vulture. It takes only 1 VL to take out a turret on a Shielded invader though, of course, after the shield is downed. It is suggested you use 1 VL and then finish off the turret with your main unless you are extremely desperate to get rid of it.

The less known useful feature about VL is Vorpal Wake. Do not underestimate its utility. It is very useful for ships that do not have a defensive Zen. Similar to riding up an ML to take advantage of its bullet capabilities, you can do the same with VL. However, you usually do not push up beyond 1/3 of the vertical screen space as the width of bullet clearing is quite small. There are cases, however, where pushing up all the way upfield is beneficial in order to collect more particles for more VLs. Take note that this is extremely dangerous and only recommended when speedrunning. For normal usage, this function is generally not used much, but it is possible to time the VL to clear bullets which are milliseconds away from hitting you and also catch multiple invaders in that VL. It is not recommended and you generally should not be using VL for clearing bullets unless you lack a defensive Zen as VLs are meant to be used pre-emptively, and not as a last resort.

APEX 1: Twin Lance

  • Game Description: Split Vorpal Lance into two projectiles for a larger surface area.
  • Numeric Interpretation: The surface area is doubled.
  • Score: 4.18 / 5
  • Ships with the APEX: Antioch (Delta), Gladius (Epsilon), Jeria (Epsilon), Neni (Epsilon), Vani-Vith (Epsilon)

Editor: The actual width has increased, making shooting even more enjoyable.

This apex does not actually split VL into 2, but instead increase the width of VL so that it can potentially hit more invaders with a single VL.

This apex is useful against dense waves. It allows ships with this apex to be much quicker due to the better invader clearing capabilities. This iis especially against very dense waves where each VL can make a huge difference in catching a couple more invaders. Also, since each VL is wider, you can even conserve 1 VL since 3 wider VLs is enough to cover the whole field instead of 4 normal VLs, which means even better speed from being able to use 1 VL the next wave where you may not be able to with normal VL. Another advantage is due to the wider VL, you also get better bullet clearing capabilities, which improves survivability as well.

A possible disadvantage, however, is that due to the wider lance, it is slightly more difficult to pop off turrets since you risk hitting the invader's hull first instead of a turret, which then registers as damage to the invader and not the turret you are aiming for.

APEX 2: High Capacity

  • Game Description: Vorpal Lance can store more energy, adding an additional Counter.
  • Numeric Interpretation: The max volume increases from 4 to 5.
  • Score: 2.81 / 5
  • Ships with the APEX: Antioch (Beta), Exarch (Epsilon), Icarus (Delta), Saber (Beta), Wraith (Gamma)

Editor: Why hold back from shooting? It will only lead to problems.

This apex increases the maximum number of counters for VLs from 4 to 5.

In community and specialist missions, this apex only benefits ships that kill so fast (usually those that are in the Full Offence class), there's sometimes no reason to use more VLs and thus you run the absolute risk of overflowing particles. For other VL ships, even those in the Offensive class, the rather fast rate of killing actually comes from VL itself, and not using it will instead more likely result in your death. There are cases where it is a good idea to stockpile 5 VLs to push through an extremely difficult wave containing many large invaders with dangerous turrets, unleashing all 5 VLs to get rid of the threats. However, these situations are rare, making this apex too situational. Thus, for ships that are unable to kill at such frightening speeds, this apex is utterly useless. If you need this apex because you are overflowing on particles for offensive ships, please go improve your skills on how to use VL by reading the Vorpal Lance section above.

In daily missions, this apex is very useful during dense and heavy waves, as you will really need all the power you can get. It is also very useful for light wave after light wave (which can happen occasionally), or when you happen to have the luck to have a very good lineup, causing you to use less VLs than what you initially wanted to use.

APEX 3: Trident

  • Game Description: Splits Vorpal Lance in three directions to strike more targets.
  • Numeric Interpretation: Lances are shot in three directions, and they share an overall 39.6 damage.
  • Score: 2.09 / 5
  • Ships with the APEX: Naya (Tau), Warden (Phi)

Editor: Nicely put, it's called a trident; not so nicely, it's a pee fork.

The bonus of this APEX is sometimes a form of negative optimization. Although the lance itself is divided into three branches and shot in three directions, covering a larger area, the cost is that the damage on each branch is reduced to one-third. The most direct consequence is that a single lance cannot eliminate raven unless the lance is used at close range. The total damage of two of the three lance branches is 26.4, while the unprotected raven have 27 health points. In other words, you either need to use the main weapon for follow-up attacks or use another lance, both of which require additional actions.

Its advantage lies in being able to more efficiently deal with sparrow swarms because one lance is enough to eliminate any type of sparrow. According to the coverage area of the trident, usually only two lances are needed to clear the vast majority of sparrows, while the remaining sparrows need to be dealt with using the main weapon or Zen. A wider range means more bullets can be cleared; a single trident can clear out a considerable safe area, thereby increasing survivability. However, these advantages cannot make up for the lack of damage. When facing attacks from heavier waves, you will have to consider the consequences of damage dispersion. When you need to get close to ensure that the invaders take full damage from the lance, it invisibly increases your number of actions. Therefore, for those players whose basic skills with the lance are not very solid, it is best to avoid this APEX altogether or simply use the base form.