Phalanx

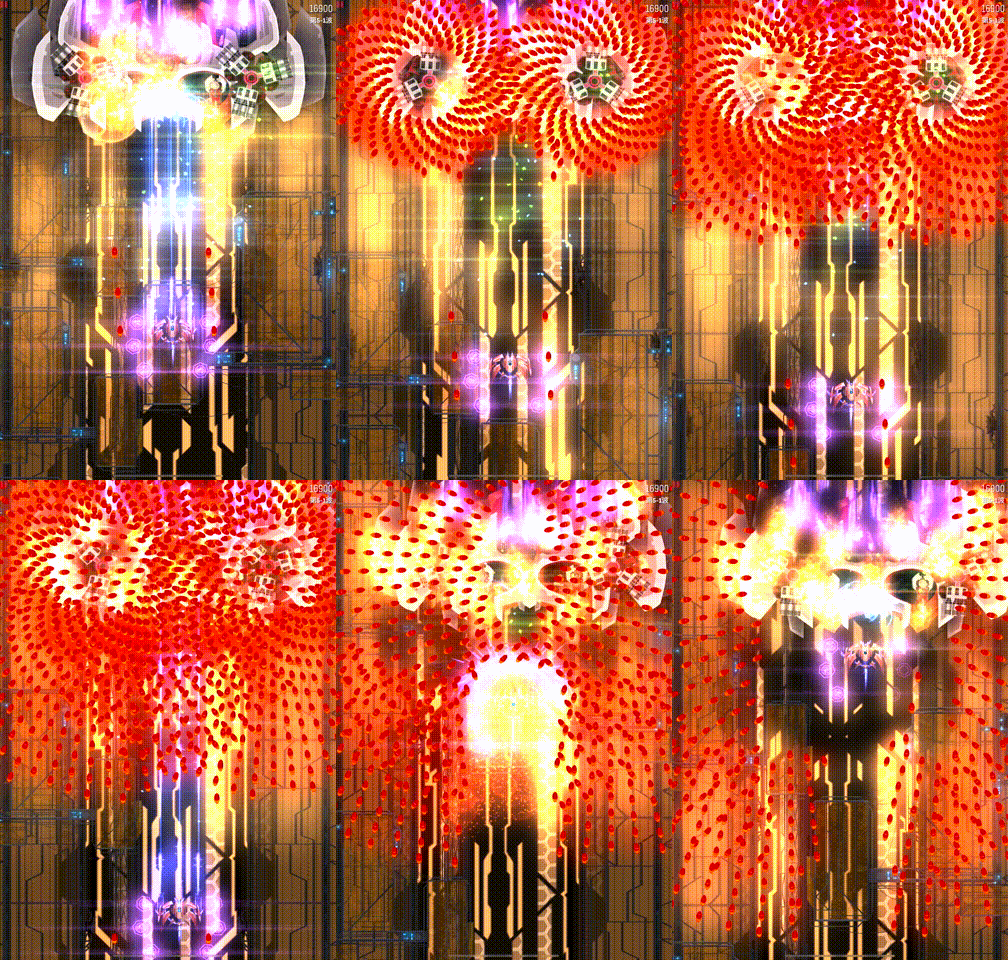
Place a shield in front of you to block the attacks.

A slightly underpowered defensive Aura, powerful in the hands of the skilled. Can be equivalent to small bursts of BEMPs. It may also be used as small Barriers, although it is not a very effective function.

The details of this skill are listed as follows:

Level12345Ultimate
Strength (%)100108116125137150
Counters234566
  • Ultimate: Increases the width of the Phalanx and extends it slightly downwards to have better side protection.
  • Score: 4.18 / 10
  • Useful Levels: 3, 5, Ult
  • Priority Level: 2 / 8
  • A strength of 100 equals to 24 bullets or 2 complete lasers (1s)
  • Illustration:

Comments

  • Editor: What would you like to block with it?
  • ☀🐕: Phalanx is a bit crap as a means of defense because it breaks immediately after only one shoveling against a flood of bullets. It might be more viable if it has infinite durability but only lasts for 4 seconds.
  • axv: This is actually a skill used to clear bullets. After activating the phalanx, rush forward to push away a bunch of bullets to gain space. Of course, the premise is that there are no lasers and boomerangs (no).

Usage

The efficiency of Phalanx increases with more counters. Having 2 counters at Level 1 is pretty insufficient for defensive purposes especially when the wave drags for quite long at later waves. The strength of the Phalanx also does make a small difference in each charge of a Phalanx being able to be more effective. The strength of Phalanx at level 1, however, while a little less efficient, is still satisfactory compared to when it is max.

The primary function of Phalanx is a shovel. Think of it as a vertical BEMP. It creates a small breathing space for you to have some freedom to move and relieve yourself. It is difficult to use as a repositioning tool since shoveling means you have to push forward in order to maximize it. Fortunately, you can shove diagonally in order to re-position yourself, but this does take a lot of skill. Phalanx is more of a scalpel bullet clearing tool. While there is a strength stat to it, it can impressively clear a small area of bullets no matter how many bullets are there in that small area as Phalanx has a tiny Phase Out time which continues to clear bullets even after the strength is depleted. This is roughly equivalent to launching 6 mini BEMPs, which is indeed more useful than one full BEMP which you may not always need. However, unlike BEMP, Phalanx does not eliminate bullets immediately in front of you, so you have to use it pre-emptively, and be careful before you actually shovel.

The important thing to know about Phalanx is to be courageous. Phalanx has extreme capability to clear out an impressive stretch of bullets if you abuse it to the max. When you deploy Phalanx for shoveling, do not be afraid to go all the way to shovel as the very short Phase Out time is actually enough time for you to react to Phalanx breaking, especially with the screenshake cue when Phalanx actually breaks. It is a bit of a strange defence: To defend yourself, you have to charge right into the massive dense field of bullets once deployed to take full advantage of it.

Phalanx can also be used as a mini barrier. This function is to aid an offensive attack, such as charging offensive Zens or aggressively using your main weapon to try and pop a turret off. Unfortunately, as the strength of Phalanx is weak, it is often rather ineffective especially for charging ML or MB which takes a long time. Like barrier, if you are using Phalanx for this function, it also needs to be slightly pre-emptive as a last minute Phalanx will not save you since bullets in between your core and the Phalanx will not be eliminated. This part makes Phalanx very annoying as you need a lot of experience with Phalanx in order to know what is the allowance time to deploy it so that bullets coming for you will hit the Phalanx and not pass through it. It is unlike Barrier where you have a visual indicator of where the barrier will be, for Phalanx, you need experience with it to know it. Once you know it, however, it shouldn't be too much of an issue.

The main problem with Phalanx is how suddenly it can break. There is simply not enough response time for you to react if you are still holding on to the Phalanx as a barrier. This is particularly the case with lasers. Even though lasers are not as effective on Phalanxes than on barriers, a large amount of lasers aimed at it, or lasers coupled with a cluster of bullets hitting will quickly break it and the lasers will kill you instantly. This results in the need to deploy another Phalanx to replace the severely weakened Phalanx in order to sustain the protection. The color of the Phalanx tells you when it might potentially break, although the color contrast can be slightly difficult to tell. Unlike barrier, multiple Phalanxes cannot stack, resulting in a waste of particles. Thus, when using Phalanx as a shovel, it is recommended you shovel all the way until it breaks, or simply burn it away by clearing stray bullets. Try not to leave it in front of you as that can create a false sense of security.

Phalanx can also be a very important positioning tool for speedrunning, particularly in early waves. You can afford to use Phalanx to move freely around the sparsely bullet filled area so that you need not worry too much about crashing into random bullets. The ultimate, which increases the width of the Phalanx, helps this even more. It is still better to move diagonally upwards slightly (which is often what you would do anywhere, to get near invaders) than to move horizontally. Be careful not to go point blank with invaders since going too near means their turrets can emit bullets underneath your Phalanx and kill you instantly.

As Phalanx rewards aggression by pushing forward, Phalanx can still be viable in very dense waves. As you deploy the Phalanx to push forward, you will kill the small invaders in front, which then gives you particles to replenish the counter you used to deploy the Phalanx. During early Acts of a daily mission, you will usually overfill on particles, often having 6 Phalanxes already at hand. This is normal. In fact, you should always try to keep the Phalanx count up, with at least 4 Phalanxes at hand. This is to reserve for heavy waves where you will have to burn through usually all 6 counters of Phalanx. Don't hesistate to burn them, because know that a light wave will follow the heavy wave (unless it's 5-3 to 5-4). However, be sure to shovel as much as possible to maximize the usage of each Phalanx. The constant destruction of smaller invaders in dense waves should keep your Phalanx count high.

The ultimate is a very useful upgrade that severely enhances the shoveling function. However, the increase in width also means more bullets than required to block off the most dangerous bullets headed for you will also hit your Phalanx, which may hinder the barrier function. It can mean a difference in blocking off bullets coming from sideways, particularly boomerangs or pellets from MIRVs.

APEX 1: Reflector

  • Game Description: Lasers reflect on the Phalanx front surface.
  • Numeric Interpretation: Laser will be reflected to invaders with 10 damage per second.
  • Score: 3.27 / 5
  • Ships with the APEX: Marauder (Beta), Valkyrie (Gamma)

Editor: Although it can reflect lasers outward, it's too fragile to withstand them.

This apex causes any lasers that hit the outer (or upper) edge of the Phalanx to reflect back to a random target, with a DPS of 20, similar to PS's Laser Reflection ult. The Phalanx is gold in color and fades to red as it takes damage. Bear in mind even though lasers are reflected, the Phalanx still takes damage from the lasers per usual.

Unlike it's barrier counterpart, this apex is not as useful. This is because you can only have one Phalanx active at any given time, as a newly deployed Phalanx will entirely replace the old one. Therefore, because lasers melt Phalanxes relatively fast, and the Phase Out time of Phalanx just isn't enough for you to wait for a Phalanx to break before deploying a new one. This means that you have no choice but to waste a bit of the current Phalanx's strength to sustain the laser reflection. The inability to stack several Phalanxes together limits the potential of this apex to be an excellent one.

While Barrier Reflector can be used with great success in laser missions, Phalanx Reflector is a lot more difficult to use to get success out of it. In fact, the health of Phalanx is so weak, that you require 3 Phalanxes to reflect off a full burst of lasers firing at you. It is possible to only use 2, but you have to be very experienced to pull it off without dying. Thus, this apex is only useful in small to medium laser density waves, which means it may even struggle to keep up on certain generic mission type waves.

APEX 2: Double Phalanx

  • Game Description: A smaller additional Phalanx is placed at the front.
  • Numeric Interpretation: A Phalanx with half of the original strength and size will be place front.
  • Score: 2.36 / 5
  • Ships with the APEX: 502-Q8 (Beta), Boxer (Alpha), Hunter (Gamma), Lorilou (Gamma)

Editor: Its existence is like particles on the condom.

This apex adds a second, smaller Phalanx at the front of the original Phalanx which has 1/3 the health of the original Phalanx, or 50% strength. They both have separate health. The breaking of the smaller Phalanx works the same way as the original larger Phalanx, there is a Phase Out time where it can potentially clear unlimited bullets in that time. Unlike Barrier, the smaller additional Phalanx will still continue to last in the rare case the larger original Phalanx breaks first.

This apex is very useful for all ships with this apex as the amount of bullets you can shove away with both Phalanxes is a lot greater due to double Phase Out time. You may also be able to do a double shovel, the first one being less since the smaller Phalanx is much weaker. It is significantly useful the more bullets on screen there are, making it slightly less effective in community and specialist missions which feature generic type of missions with a bullet density not as much as in daily missions.

APEX 3: Crisis EMP

  • Game Description: Instantly clear the area inside the Phalanx with an EMP upon activation.
  • Numeric Interpretation: Activate a Bullet EMP inside the Phalanx as soon as using the Phalanx.
  • Score: 2.27 / 5
  • Ships with the APEX: Esperon (Epsilon)

Editor: Quietly entering the village, don't let the shooters in.

This APEX is good news for the Phalanx. One use of the Phalanx is to act as a bulldozer, pushing forward through a large number of bullets. However, when you charge forward, you may overlook the bullets already inside the Phalanx, leading you to stupidly collide with them. Therefore, with the bonus of this APEX, you no longer have to worry about being killed by bullets inside the Phalanx when using it as a bulldozer. Charge forward confidently and pave the way!