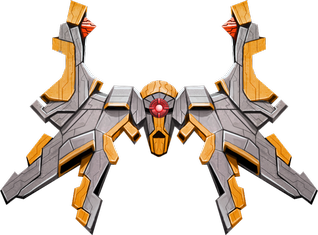
Hime

The name means princess, and of course you have to clear the mission gracefully like a princess.

Basic Info

  • No: 46
  • Ship: Hime
  • Affinity: Armor Piercing
  • Type: Lightfury
  • Main Weapon: Spirit Lash
  • Aura: Chrono Field
  • Zen: Mega Laser
  • Rarity: Super Rare
  • Price: 3000
  • Main Description: Fast moving homing projectiles that fire forward with a random initial angular displacement.
  • Upgrade Info:
Level12345Ult
DPS20.0021.0022.0023.0024.0025.00
  • Test Results:
MainAuraZenSurvivalSurvival TierSpeedrunSpeedrun TierFunFun Tier
90.0099.2790.5551.82A+27.27B39.82A
APEX1APEX2Base ScoreBase RankLow ScoreHi ScoreApex RankFinal ScoreFinalRank
50.9148.00279.8229327.82330.7343449.6429
  • Main Weapon Illustration:

Survival

  • Hime's main DPS is pretty lackluster. It relies a lot of its ML to deal the bulk of its damage to invaders. However, the lack of need to aim means you can focus on dodging.
  • Do not rely on Hime's main to pop off turrets. If you really need to pop off a turret, use ML to do so.
  • Charging an ML is almost always beneficial unless the wave is a light wave. Always charge ML as much as you can.
  • It's best to always deploy a CF before you charge an ML. While it is not always necessary, it will guarantee your safety. This is especially so in daily missions since particles are abundant. In community and specialist missions, if the field is pretty clear of bullets, you should then opt not to deploy a CF since there won't be enough particles the next wave.
  • Chrono Hopping is of absolute essence to Hime, as you can jump sides of the field when you are faced with a lot of bullets coming at you.
  • CF is a great tool against lasers fire just before they fire.
  • Try to refrain from going upfield as that will collect too many particles, resulting in overflow. Conservation of particles is key for Hime. It is less of a concern in daily missions, but the firepower of Hime even with constant ML spamming may not be enough to get you through so try not to overfill. This is especially so when a lot of MLs will suffer damage reduction from armor.
  • Sometimes you get heavier waves and thus face a scarcity of particles. In such a case, chaining ML is of necessity. Deploying CFs one after the other, each CF for one ML becomes the strategy. Judging the optimal times to start charging the next ML is of key. You need to roughly know how long that size of CF is going to last and start charging ML so that CF would almost just nice fade when ML fires.
  • 3/4 of a full CF size is sufficient to sustain chaining of MLs. Remember initial MLs require less charging time so a smaller size for earlier MLs is sufficient. The pattern is thus always to charge ML increasingly upfield, starting from the bottom of the screen.
  • You can also deploy a smaller CF less than half of full size inbetween bigger CFs so that ML has time to cool down. However, if the next CF is already of that large enough size of 3/4 full, simply deploy it after the previous one fades and charge ML accordingly.
  • This is when conservation of particles is of absolute key. You want to grab just enough particles to create the optimal size of CF for such circumstances.
  • Important thing is to not panic, and only deploy CFs after making near full use of the 0.5s Phase Out time.
  • A CF with half the radius of the full CF size is sufficient time to charge an ML, provided ML has cooled down nearly completely.

Speedrun

  • Even though Hime has pretty lackluster DPS, its ML deals a lot of damage and knowing when to use ML and great knowledge of its cooldown is of absolute essence in speedrunning.
  • Always aim to hit the cockpit of Armored Vultures to maximize damage.
  • Charge MLs whenever you can, unless there are only 2 Ravens in the line of fire.
  • As you can't move when charging ML, invader random movement will cause speedrunning to have quite a bit of RNG when some invaders completely dodge the ML.
  • While Hime's main is pretty fast, they also can get pretty funky because they curve. This implies that Hime's Spirit Lash has some travel time. This also means that it is possible to charge ML slightly earlier as the last of the Spirit Lashes hit the last of the invaders. Particularly, if the last surviving invaders are Ravens and Sparrows, it is easy to estimate roughly estimate how many more Spirit Lashes are needed to finish them off. I generally base off the number of Spirit Lashes on field rather than duration as it is more reliable.

Fun

  • Hime's main is pretty satisfying to hear. It is also very fun to watch in action, particularly when maxed as the rate of spirit lashes is insanely fast.
  • Hime has probably the most intuitive reactor position in the game, being in the middle of it's X shape. Piloting Hime definitely feels like one of the easiest and a real joy. Dodging is probably one of the easiest with Hime, and anyone looking to learn dodging (at normal speed) should pick up Hime.
  • Although Hime's main actually causes a tiny bit of screenshake (it's actually really hard to notice the screenshake unless you specifically look out for it), the reactor positioning means the minute screenshake is of negligible effect in being able to dodge very well.

Trivia

  • Maybe you can think of its appearance as a game controller.

APEX 1

  • Name: Armor Piercing
  • Type: Zen
  • Description: A specialized laser that pierces armor.
  • Interpretation: The laser ignore 30% damage reduction of armors.
  • Form: Lambda
  • Price: 30000
  • Score: 3.18 / 5

In daily mission, where it is impossible for ML to hit cockpits after cockpits of invaders, the damage of AP ML is significantly increased. This allows to position yourself in an appropriate position between the many columns of invaders and worry less about maximizing the damage of ML by centering it to the invader columns. The freedom of positioning anywhere so long ML hits something also aids a left-to-right (or vice versa) ML sweep of invaders when there is a bulky invader behind to absorb the rest of the damage. This strategy allows you to continuously replenish CF to pull off consecutive MLs until the bulky invader is finally destroyed. This is shown especially in 2-4, 3-3 and 5-4.

APEX 2

  • Name: Double Shot
  • Type: Zen
  • Description: Two separate energy releases create two beams in quick succession.
  • Interpretation: Two 100-damage lasers will be fired one by one, with a one-second interval.
  • Form: Epsilon
  • Price: 25000
  • Score: 3.00 / 5

This apex is a game changer for Hime. Its gameplay feels very different and there are revolutionary ways you can utilise it. One of the ways is to obviously, deal with Raven crowds as you can split the Mega Laser between 2 columns and this results in more coverage. The second way, which is revolutionary, is a turret sniper. you can use the 2 Mega Lasers to snipe off 2 turrets in a Vulture. This is enough delay time between each shot that you can quickly go over from one MIRV Bloomer to the other to destroy both. However, sniping off both MIRV Bloomers becomes difficult in later waves because you risk the lack of particles and thus dying from moving over to the other bloomer. It is also a high risk move as you explode a lot more MIRVs and thus make the field even more difficult to navigate. Thus, in later waves, you usually simply snipe the 2 turrets on your side.

Because Hime has CF, it can deploy a new CF at its new location if you need to perform double turret sniping but the currently deployed CF is not big. This requires some luck as you need particles for at least a deployable second CF. However, this means you potentially waste CF time in the old CF which you had to depart from, and thus, also particle wastage indirectly. Unfortunately, RNG is a big factor here. A misalignment of either shots can result in less optimal results and turrets not being popped properly.

Video Illustration