
Hunter

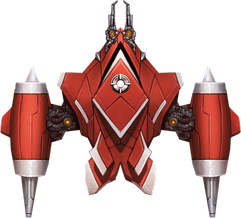
It looks a lot like some kind of insect, especially if you think of the front end as some sort of mouthparts.

Basic Info

  • No: 47
  • Ship: Hunter
  • Affinity: Armor Piercing
  • Type: Double Defense
  • Main Weapon: Hyper Blaster
  • Aura: Phalanx
  • Zen: Teleport
  • Rarity: Rare
  • Price: 1500
  • Main Description: 2 fast, forward firing, side-by-side projectiles.
  • Upgrade Info:
Level12345Ult
DPS25.0026.2527.5028.7530.0031.25
  • Test Results:
MainAuraZenSurvivalSurvival TierSpeedrunSpeedrun TierFunFun Tier
73.6450.1898.1839.82A11.45D19.09D
APEX1APEX2Base ScoreBase RankLow ScoreHi ScoreApex RankFinal ScoreFinalRank
16.0037.82222.0075238.00259.8283330.1885
  • Main Weapon Illustration:

Survival

  • As Hunter's main is side by side, it can be hard to pop turrets off. This makes it hard to pop off MIRV Bloomers especially with so many MIRVs on field.
  • As usual, TP should be used to delete MIRVs. However, Phalanx is a very important backup and helps shovel away many bullets to allow breathing space. Push forward with the Phalanx. This may sometimes need to be done more than once, especially in MIRV/Shuriken missions. The shoveling helps Hunter deal with spinners pretty well.
  • Hunter relies on extreme mobility around the side of the field it is on. It also relies on keeping that side of the field clean since it's forward firing and the random movement of invaders will require a bit of lateral space as well.
  • The speed of the main also allows you not to be upfield so much. However, the shoveling of bullets will often put you at least halfway up the field.
  • TP is used to change sides of the field after you are done eliminating all the invaders up to a Heron on that side of the field.
  • To look for a suitable spot to go to, first charge TP in advance. While in time slowdown, look for the bottom most MIRV or MIRV cluster, and not the region with the most number of MIRVs. Ensure that to the side of this MIRV or MIRV cluster, there are no other MIRVs. This might require you to wait a while and let the TP charge run until the MIRVs to the side exit the bottom of the screen.
  • After the arrival spot is deemed safe, TP there and immediately deploy Phalanx, and shovel everything else away. You must be quick since there will be a lot of MIRVs in front of you which will likely explode as well.
  • You may need to do this twice because some MIRVs explode on your way to shovel upwards. However, try your best to only use a single Phalanx because Hunter is slow and you may not have enough particles to replenish your Phalanx charges, so dodge the remaining pellets released by these MIRVs.
  • Lasers are a problem for Hunter. You should use TP to avoid tracking lasers. When arriving at your new location, you may need to deploy Phalanx straight away to clear out more space. But never go head on with tracking lasers as your Phalanx will melt too fast.
  • Be careful of spread lasers. You want to continue to follow them, but use Phalanx to shove away the bullets while moving with the spread lasers. Be careful to retreat back before the spread lasers fire because it can be hard to judge whether your reactor is in line with lasers.
  • When faced with straight firing lasers, Phalanx shouldn't have too much of an issue, but do be prepared to deploy another one before the previous one breaks.
  • Unfortunately, as all of its defences have a very micro effect, only clearing out that many bullets (Phalanx) or getting you out for only a while (TP), Hunter can be quite easily overwhelmed.

Speedrun

  • Hunter has a fast firing main, but a pace that is quite easy to follow. Thus optimizing the main is not terribly difficult, although it is fast paced and difficult to land every shot sometimes.
  • In MIRV/Shuriken missions, the clean-up after eliminating most of the field is headache. The remaining MIRVs that were fired before most of the Ravens died will be troublesome to deal with which will cause you to waste a lot of DPS in trying to clean them up.
  • Bear in mind TP means lost DPS, so avoid TP-ing if you can for speedrunning.
  • Unfortunately, optimizing the main is all you can do, and it has no means to deal additional damage from its abilities.

Fun

  • Because of its fast firing main, and its abilities that grant it great mobility, Hunter has a fast paced, constantly on-the-move playstyle which is very fun.
  • The main is also rather satisfying to hear in action.

Trivia

  • Few people understand the idea of using departure EMP, because releasing an EMP at the starting point really seems useless.

APEX 1

  • Name: Departure EMP
  • Type: Zen
  • Description: Residual energy is converted to a Bullet EMP on the location the ship teleports away from.
  • Interpretation: A Bullet EMP of range 80 will be activated at the starting point when using Teleport.
  • Form: Alpha
  • Price: 5000
  • Score: 1.00 / 5

This apex creates a small BEMP with a radius of 75 (normal TP Arrival EMP has a radius of 50) at the spot it TP-ed away from.

This apex is...too specific. There is one enhancement to this apex which does boost it’s survivability by quite a fair bit. The very specific technique that can be employed using this apex is to make your way all the way into the Vulture’s cockpit before the MIRVs from its MIRV Bloomers fire, and then pre-charge TP. You may also start off the wave with yourself already being in the cockpit of the Vulture to save a Phalanx charge. Wait until the Bloomers fire, then when the MIRVs get close to your reactor, teleport away to either side of the Bloomers, before the MIRVs can explode. This will result in a pretty significant MIRV count reduction, allowing for better survivability, and puts you point blank with one of the Bloomers to take it out quickly and give you better breathing space. However, because shurikens flood the field too quickly, as well as the fact that after the first round of MIRV Bloomers firing would result in too many MIRVs from other invaders as well, this can only be done once, at the start of the wave. It requires extremely good estimation of when the MIRV Bloomers are going to fire when they first appear so as to make your way into the cockpit at the right time.

Despite this advantage, it can be argued that one could simply instead, just go for one of the MIRV Bloomers straight away and pop it off before it fires, which can be done without this apex. This may have a few problems: Because of Hunter’s main which is a dual shot side-by-side, it can be difficult to quickly pop off the bloomer before it fires because you must be deadly accurate in landing both shots all the time. The second problem is there might be invaders below the Vulture and you must go point blank with the bloomer, but if the middle turrets are T4 shuriken launchers, they will reach you before you can aim properly at the bloomer to pop it off. The third possible problem is if the MIRV Bloomers are of very high Mk, there may be insufficient time to pop off a bloomer before it fires no matter how accurate you are.

Arguably, this apex makes it easier to deal with MIRV Bloomers, instead of having to aim accurately at the Bloomers to pop them off. Another advantage of this apex is it sort of acts as a very mini pseudo Phalanx, since you can shovel upfront, then TP just slightly behind in such a way that the area of clearance from both departure and arrival EMPs slightly overlap each other, thus creating more vertical clearance space.

Aside from having the niche use of being better able to deal against MIRV Bloomers, another thing this apex helps is the increase of fault tolerance when teleporting to a new location. Given the mess of bullets going everywhere, there is sometimes not enough time to properly decide where to go, or everywhere simply has MIRVs in that you can’t arrive safely in a new location without having to explode MIRVs left right center and thus creating an extreme mess of bullets. The Departure EMP helps in cleaning up these pellets from the exploded MIRVs when you teleport once again quickly, so that your second new arrival location will not have these pellets coming from awkward angles.

APEX 2

  • Name: Double Phalanx
  • Type: Aura
  • Description: A smaller additional Phalanx is placed at the front.
  • Interpretation: A Phalanx with half of the original strength and size will be place front.
  • Form: Gamma
  • Price: 15000
  • Score: 2.36 / 5

The additional shoveling power from double Phalanxes increases Hunter’s survivability by a fair bit. That's it, nothing more to say.

Video Illustration