Yigothu

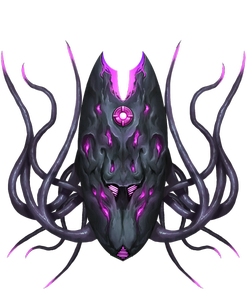
The tentacle-like appearance reminds people of Cthulhu.
Basic Info

  • No: 54
  • Ship: Yigothu
  • Affinity: Shield Breaking
  • Type: Versatile
  • Main Weapon: Zatha Probes
  • Aura: Chrono Field
  • Zen: Reflex EMP
  • Rarity: Super Rare
  • Price: 3000
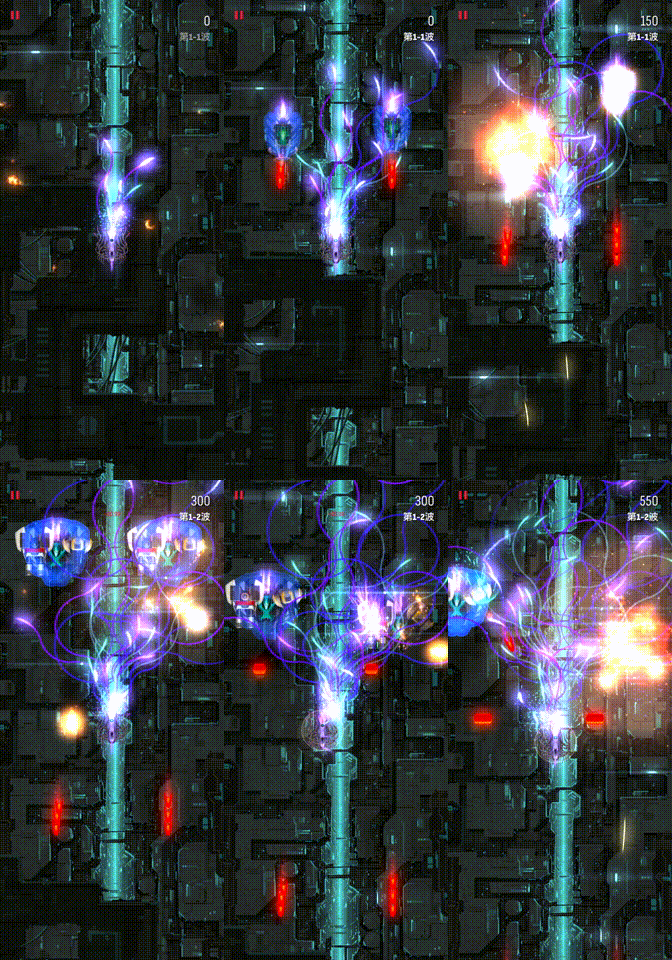
  • Main Description: Very slow moving homing projectiles fired in a general forward direction that moves in sine waves.
  • Upgrade Info:
Level12345Ult
DPS20.0021.0022.0023.0024.0025.00
  • Test Results:
MainAuraZenSurvivalSurvival TierSpeedrunSpeedrun TierFunFun Tier
88.6499.27109.0953.45S23.45B-37.09B+
APEX1APEX2Base ScoreBase RankLow ScoreHi ScoreApex RankFinal ScoreFinalRank
24.7336.36297.0017321.73333.3638447.3632
  • Main Weapon Illustration:

Survival

  • Yigothu has the best Aura Zen combination. The 2 of them go hand in hand extremely well. CF slows down the bullets and stacks them up, while REMP clears the mess of stacked up bullets.
  • Yigothu is also one of the easiest to use ship in the game. All you have to do is to deploy CF when you are unable to dodge, and then at the end of the CF, charge an REMP to clear all the bullets. Rinse and repeat, and WIN. You don't even need to care about aiming.
  • Be sure to maximize the REMP clearing capabilties. This requires knowing when the CF is going to end and thus only charge REMP just before (give and take ~0.5s) it ends. Mastery of this timing (it's actually not too hard after a while, you'll get the timing quite quickly) is key to the ultimate survivability in your hands. Just be sure not to start charging too late, being early is better than late.
  • In community and specialist missions, head to the upper edge of the CF (or wherever is closest to the middle of the field) when you use REMP, because the REMP is sufficiently large enough to cover the entire CF from that position.
  • In daily missions, there are so many particles you can simply just keep deploying CFs in the middle of the screen and fire REMPs in the middle of the screen. However, for heavy waves, after CF expires, quickly head back down to a bottom corner of the screen.
  • In very dense waves, you can pull off REMP twice. In light waves, if the wave is the final wave of an Act, you can also pull off an REMP. Otherwise, just reserve it for a heavier/denser wave. The heaviest and densest waves will allow you to pull off REMP 3 or 4 times.
  • Yigothu's CF also allows it to Chrono Hop (Jump out of the CF and quickly dash to a safer spot) in the case a small size CF needs to be deployed. This should be only used when you have recently used an REMP (give about ~6s for it to recover completely).
  • Because of the relatively long duration of CF, and the not-too-long recharge time of REMP (~6s), you can usually consecutively pull off this combo if you gather enough particles during the CF time for another full CF. Generally speaking, unless you are faced with Condors or Rocs, you should always have enough particles.
  • Just try not to deploy consecutive full size CFs after each other, attempt to dodge a bit after the last CF ends. Remember that when the CF ends, you have enough space to dodge for quite a while due to REMP. If you are struggling to pull off an REMP (you should be able to judge if the REMP takes more than a second to pull off from it's animation), immediately Chrono Hop away from the mess of bullets stacked up.
  • Remember to kill invaders behind a Vulture first (deploy CF on top of a Vulture) so that you get the particles from the destroyed behind invaders to keep yourself safe.
  • Yigothu has a slight bit of burst damage that comes from the Zatha probes that are already on screen in-between act or wave transition. This helps out a little bit killing faster, although it's generally not very significant.
  • You can drop CF on top of invader turrets and then just hover over the turret to pop them off, but i generally don't recommend it. It is a more aggressive style that may not always work out very well, as an exit from being so far upfront may not be easy unless you have another CF on standby.
  • However, Yigothu will struggle at Rocs due to its lackluster damage (and REMP doesn't help obviously). With a Roc with only bullets it can survive with sufficient dodging and grazing to pull off small CFs. But with a Roc that has fast tracking lasers and bullet spinners / MIRV Bloomers, Yigothu will struggle a lot due to its inability to deal with so many rounds of lasers aimed directly at it. Your only hope is to aggressively graze off bullets and deploy CF to Chrono Hop like crazy as the lasers fire to avoid it.

Speedrun

  • As a rather defensive ship, it is surprising that Yigothu can be relatively fast. But it can be optimized to be fast due the ease to pull off REMP for damage. You can pull off REMP very safely many many times.
  • REMP only if >4 Sparrows
  • REMP only if >4 Ravens. But before you do that, deploy a CF in the middle of them, then run all over them to strip their shields before launching REMP.
  • If they are Eagles around Ravens, deploy CF on top of all of them, then run all over the Eagle to strip it of its shield, then run to the Ravens briefly (don't need to run on top of them, just nearby will do) to strip them of their shield as well. Finally, head back to the Eagle. When you know the CF is fading, REMP to maximize the CF time and the damage dealt.
  • There's generally no point to use REMP on a Vulture unless there are only one line of invaders in front of the Vulture.
  • Extremely high level optimization is possible by rapidly moving in circle around the field in order to flood the field with the slow moving Zatha probes. This allows for some pre-firing when the invaders of the next wave fully arrive as they will quickly get hit by these probes left around the field. This can be done even in heavy and/or dense waves.
  • This can be easily done due to the abuse of Phase Out. So long you make very quick loops to quickly circle back to the CF, you can remain invincible while spreading out your Zatha probes.
  • Because waves can get so dense in daily missions, deploy a CF at the lower half of the screen first, then strip the invaders of their shield only on the lower half of the screen (and the mid line of the screen). Heading on top to strip the invaders of their shield on top will cause too many invaders to have their shields stripped, which will then cause several of them to regenerate their shield.
  • Once you clear the bottom half of the screen in such dense waves, then proceed to strip the shields of invaders upfield and destroy them with a second REMP after their shields are stripped.
  • With the Zatha probes quickly stripping the shield and thus taking full advantage of the SB bonus, you can then use REMP to continue destroying them quickly along with your other Zatha probes being released.

Fun

  • Yigothu has one of the most visually appealing mains out there. It is probably the only main that can have a different array of colors, which looks spectacular. Coupled with the fact that when you deploy CF, you don't have to do much usually, you can really admire the spectacle of colors on screen.
  • Launching a REMP as often as possible without running into massive cooldowns, gameplay wise, is the only thing that is going for Yigothu. The AoE damage is fun to deal, vaporizing Ravens (when allowed to be stripped of their shield first) and Sparrows alike.
  • Unfortunately, as REMP is the only real damage dealing component that is fun and there is no need to aim, Yigothu can get boring after quite some time.

Trivia

  • Yigothu was only introduced into Phoenix 2 at v2.1.
  • Yigothu is the most expensive ship to fully ult and get both its apexes, costing a whooping 97,300¢ to do so, assuming you use your own credits to buy the ship and both apexes (and not getting any of them through the warp gate).

APEX 1

  • Name: Serenity
  • Type: Zen
  • Description: Reflex EMP is triggered manually with increased range.
  • Interpretation: The max range increases from 225 to 280, but you need another click to activate it.
  • Form: Omega
  • Price: 50000
  • Score: 1.55 / 5

The Omega Apex for Yigothu increases the Reflex EMP range by 25%, as well as making Reflex EMP into a manual trigger instead. It is similar to that of Mega Laser or Mega Bomb, which means it will only activate when you re-engage touch on screen.

The increased REMP range helps in some circumstances such as in a wave where invaders are scattered everywhere, particularly in 5-4. It also helps survivability wise, but when speedrunning in this case, there’s not much point when you are going to be in the middle of the field at all times anyway. The Manual Trigger, in dense waves, can become a hindrance when the visual cue cannot be seen at all and the charge complete sound is very soft. It is also a massive hindrance to cases where REMP has not completely cooled down, which may lead to unintentional cancels in REMP charging. The REMP in 5-2 is a particular highlight where you must very carefully listen out for the sound cue before re-engaging touch to trigger REMP. The Manual Trigger only works very well in Sparrow only waves with regards to speedrunning, as you could prepare REMP beforehand and launch it when all the Sparrows arrive, as demonstrated in 5-1. Otherwise, holding your REMP charge will waste DPS since Zatha probes are not released when holding on to the charge, hindering speedrunning instead.

This apex benefits more for survivability purposes, as the increased REMP range helps a lot in survival when trapped at one corner of the field. The Manual Trigger also allows REMP to be released at precisely the right time, which is after CF expires.

APEX 2

  • Name: Deep Field
  • Type: Aura
  • Description: A slightly larger Chrono Field that also slows down turrets.
  • Interpretation: The max radius increases by 25% (about 200), the turrets' speed are slowed down to 30%.
  • Form: Sigma
  • Price: 35000
  • Score: 2.27 / 5

Generally more useful against larger invaders, particularly against boss invaders which are Condors and Rocs, this apex allows you to use the turret slowdown opportunity to go point blank with the turret, sitting right on top of it so as to pop it off as quickly as possible. The slowdown of turrets on other invaders smaller than a Vulture doesn’t really help otherwise due to how quickly you regain particles from using REMP after stripping the shields of invaders, recovering Aura quickly. The increased CF range is also hardly of a help, although in heavier waves that don’t have Ravens or Sparrows, this will help launching an REMP slightly more optimally.

Video Illustration