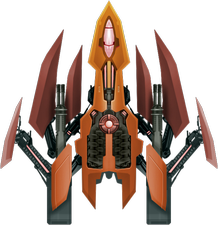
Predator

It's probably an illusion, I think its name doesn't match the actual thing.

Basic Info

  • No: 70
  • Ship: Predator
  • Affinity: Armor Piercing
  • Type: Balanced
  • Main Weapon: Dual Blaster
  • Aura: Barrier
  • Zen: Reflex EMP
  • Rarity: Rare
  • Price: 1500
  • Upgrade Info:
Level12345Ult
DPS25.0026.2527.5028.7530.0031.25
  • Test Results:
MainAuraZenSurvivalSurvival TierSpeedrunSpeedrun TierFunFun Tier
94.0972.00109.0939.27A-27.27B31.64B
APEX1APEX2Base ScoreBase RankLow ScoreHi ScoreApex RankFinal ScoreFinalRank
78.5530.55275.1831305.73353.7320451.9125
  • Main Weapon Illustration:

Survival

  • Predator has a very technical and surgical gameplay. It requires using barriers to precisely block off boomerangs and cutting off bullet lanes.
  • Part of the standard barrier technique is still employed where possible. You would place a large barrier around the invaders to make use of the inner lining.
  • However, what's unique about Predator is you should waste no time in deploying that barrier. This is because you'll need some of the leftover uncollected particles after you head upfield to place your barrier.
  • After the large barrier is deployed, head back down and stay behind the barrier as usual. Then here is the tricky technical part: Scan for the most invader dense spot and place a smaller barrier such that the top edge of the barrier is where you want to be, as close as where you can be.
  • You need to wait for the right opportunity where it is comfortable for you to head slightly above the barrier to place your smaller barrier. Otherwise, if no such opportunity exists, then you have no choice but to deploy the smaller barrier when you are positioned yourself closest to the edge of the larger barrier.
  • Once the smaller barrier is deployed, quickly head into the barrier (it will not last long), and release an REMP to deal the damage. REMP thus primarily becomes an offensive tool. All these must be done as quickly as possible when the wave arrives. This is what I call "barrier extension".
  • After using REMP, sweep on only one side of the field so that the Ravens will be mostly gone. Then do the same for the other side.
  • Predator's main is pretty thin, and landing one burst of the main on a turret immediately pops it off on a Vulture.
  • One burst of the main also potentially destroys up to 2 Ravens when optimized properly.
  • At later waves, it may become too dangerous to deploy barriers upfield. This is when surgical barriers matter. Deploy barriers such that crowds of invaders are just outside the barrier. This blocks off their bullet fire very effectively. Particle conservation is very important here so stay below the middle horizontal middle line of the field. Keep doing this as much as possible.
  • If you run out of Aura, use REMP as your last resort. This is why it's important to deal REMP damage as early as possible as REMP requires time to recharge.
  • At the end of every wave, there should be enough time for you to run upfield to deploy a new barrier.
  • The newly deployed large barrier can help you out to destroy the last few Ravens much more easily. Just beware not to take your time to destroy the Ravens after the barrier is deployed as the barrier can only take so much damage.
  • As Predator's barriers are usually deployed small other than the initial barrier, DDLs are less of a concern, but be careful not to deploy it carelessly under one. DDMBs are more of a concern against barriers since even the smallest barriers are huge enough to be in the radius of the DDMB.
  • To avoid lasers, deploy a barrier around yourself just before the lasers fire.

Speedrun

  • REMP makes for some good time if optimized properly.
  • Unfortunately due to its technical gameplay, if you don't kill fast enough, you can run into end-wave problems which require you to dodge a lot. Due to the thin main, you will waste a lot of DPS.

Fun

  • Predator has a unique gameplay which uses Barrier very differently from many other barrier ships.

Trivia

  • Predator was only introduced into Phoenix 2 at v3.2.

APEX 1

  • Name: High Damage
  • Type: Zen
  • Description: Energy actuators increase the damage of the EMP.
  • Interpretation: The damage increases from 20 to 30.
  • Form: Delta
  • Price: 20000
  • Score: 4.91 / 5

Really helpful for crowded days as this means taking out Ravens much faster. You have much better capability to sweep your main across the field without facing too much resistance from the Ravens in front since the increased damage REMP severely weakens the Ravens in that they go down very easily from a quick sweep. This equates to more Ravens killed per main burst.

APEX 2

  • Name: Reinforced Lining
  • Type: Aura
  • Description: Increases strength of Inner Lining.
  • Interpretation: The inner lining of the barrier will have the same strength as the outer lining.
  • Form: Alpha
  • Price: 5000
  • Score: 1.91 / 5

This apex can be useful if you know how to set-up upfield barriers properly. This involves destroying invaders with spread turrets (especially dart spread turrets) or MIRVs first. Doing so allows you to use the downtime between bursts to quickly head upfield to dump a barrier there, without being trapped between lanes of bullets. Pulled off right, this apex can buy you more time to snipe down invaders which carry turrets as mentioned above.

Video Illustration