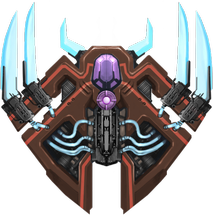
Qhelqod

Don't get me wrong, this ship was not originally pink.

Basic Info

  • No: 78
  • Ship: Qhelqod
  • Affinity: High Impact
  • Type: Balanced
  • Main Weapon: Uqtor Bolts
  • Aura: Barrier
  • Zen: Mega Bomb
  • Rarity: Rare
  • Price: 1500
  • Main Description: 2 sets of forward firing projectiles that are initially fast, and abruptly reduce speed after a certain distance traveled
  • Upgrade Info:
Level12345Ult
DPS25.0026.2527.5028.7530.0031.25
  • Test Results:
MainAuraZenSurvivalSurvival TierSpeedrunSpeedrun TierFunFun Tier
105.0072.00110.1841.45A44.18A+38.73A-
APEX1APEX2Base ScoreBase RankLow ScoreHi ScoreApex RankFinal ScoreFinalRank
27.6471.27287.1825314.82358.4517482.8217
  • Main Weapon Illustration:

Survival

  • The strongest Barrier-MB kit of the 3. Because of its strength in Unprotected missions, MB simply wipes Ravens clean. You can even say that Ravens just don't exist on most waves.
  • Stay at the bottom of the screen when not using MB. Qhelqod's main does not require you to go near invaders.
  • In community and specialist missions, it's important that you enclose all invaders in the barrier upfield as you don't any bullets leaking out of the barrier when you charge MB. Make sure you deploy your barrier low enough such that you can still see a reasonable portion of the upper half of the barrier.
  • You can then charge your MB very near the barrier, your reactor just touching the outer edge of the barrier. In this way, you may even be able to make use of MBc to completely destroy Herons or heavily damage Eagles.
  • Unfortunately, it is usually very difficult to put barriers upfield in daily missions because there are simply too many invaders upfield, especially in dense waves.
  • This requires a lot of understanding how many particles you need for a full barrier size. Deploy a barrier while below, and then go upfield a bit, behind your barrier to collect more particles and spam deploy more barriers where you are. The spam of barriers should last you long enough for the wave, if not most of it. Leave enough particles upfield for an upfield barrier.
  • Keep one deployable barrier at hand. Deploy this barrier near the end of the wave nearer the bottom of the screen, then before the last of invaders die, then go upfield through one side of the field and deploy the barrier upfield. Eliminate the last of the invaders and charge MB.
  • If there is not enough time to go upfield to deploy barriers before the last invaders die, it is fine. Deploy whatever you can where you are and start charging MB.
  • In daily missions, MB can be charged almost every light or heavy/dense wave. Particularly, light waves are great candidates for charging MB because Qhelqod has a lot of difficulty to chase down dart streamer Sparrows.
  • Because medium waves don't feature these annoying Sparrows much, use these waves as a chance for MB to cooldown.
  • Because of the instant elimination of Ravens, you can focus on eliminating the turrets of larger invaders such as Eagles. Particularly, the middle turret of Eagles can be very deadly.
  • Qhelqod has a very strong main which can pop off 2 turrets on a Vulture near simultaneously when positioned properly, which is of little issue with a proper barrier placement since no bullets should ever reach you.
  • Against lasers, a barrier around yourself works well. The accumulation of barriers where you are should protect you well, but always standby a barrier at hand. In such laser waves, particularly denser ones, you will want to MB it so that there would be either lesser lasers against you or none at all.
  • Qhelqod struggles more with larger invaders such as many Eagles in a single wave (or Eagles coupled with Herons) since you get less particles for last minute smaller barriers. Try to aim for the middle turret on Eagles since they are the most dangerous.
  • In community and specialist missions, for frontline Vultures, Qhelqod should have no problem as there is enough time to pop off the dangerous turrets on the Vulture before it can break the barrier. Whatever is behind the Vulture shouldn't matter too much since the invaders will all be dead from MB, or the bullets from Eagles will be pretty spread out. Just beware of boomerangs and MIRVs on them.
  • Obviously, Qhelqod struggles with Rocs and Condors. You'll just have to graze as much as you can to pull off small barriers.

Speedrun

  • It's insane MB capability to eliminate Ravens instantly earns it high praise for speed.
  • The insane capability to pull off MB after MB almost consecutively makes it very fast. It's kind of like a little brother of Baqlor in some sense, except forgoing a few MBs.
  • The main is easy to handle, although it does suddenly slow down after a certain distance traveled, but it's not too much of an issue. This makes the main optimization quite easy.

Fun

  • The feeling of MB just instantly eliminating Ravens is immensely satisfying.
  • The main makes a pretty interesting sound that is nice to hear in action.

Trivia

  • Qhelqod was only introduced into Phoenix 2 at v4.1.
  • Qhelqod's main is among the only two weapons where its projectiles that slow down after travelling a certain distance.
  • Qhelqod is one of the 4 ships in the game where its apexes have a different thruster configuration/location than its original base form. In particular, the Gamma Apex has 6 smaller thrusters instead of one huge thruster. The Beta Apex and the base form have identical thruster location/configuration.

APEX 1

  • Name: EMP Core
  • Type: Zen
  • Description: Fusion Core also destroys enemy bullets.
  • Interpretation: The bullets within a range of 100 will be cleared.
  • Form: Beta
  • Price: 10000
  • Score: 1.73 / 5

Unfortunately, this apex is not much of a help. It only helps on some rare occasions where you can rush forward afterwards to charge an MB to land MBc on the wave’s invaders, but other than that, the benefit is minimal, as the small amount of bullet eliminated doesn’t help much to sustain barriers.

APEX 2

  • Name: Reflector
  • Type: Aura
  • Description: Laser reflect on the Barrier outer surface.
  • Interpretation: Laser will be reflected to invaders with 10 damage per second.
  • Form: Gamma
  • Price: 15000
  • Score: 4.45 / 5

The representative of the barrier reflector. When talking about barrier reflection, almost everyone will think of this ship. One of the uses of the reflector is to charge MB in advance, that is, before the invaders are destroyed, hide in the barrier to charge the Mega Bomb, and wait for the barrier to reflect the laser fired by the invaders to destroy them. Another way to use it is in unprotected missions, by charging in the barrier and waiting for the reflection of invaders in the back to destroy the vulture in the front, and then releasing Mega Bombs to destroy the small invaders in the back. Mega Bombs and barrier reflections can be said to complement each other, and the best effect can be achieved when the two are combined.

Video Illustration