
Jn'dur

Just like the shower in the bathroom.

Basic Info

  • No: 8
  • Ship: Jn'dur
  • Affinity: Shield Breaking
  • Type: Balanced
  • Main Weapon: Plasma Diffuser
  • Aura: Barrier
  • Zen: Mega Bomb
  • Rarity: Common
  • Price: 500
  • Main Description: Spread of very slow moving diverging projectiles, each set of projectiles fired in very quick succession.
  • Upgrade Info:
Level12345Ult
DPS27.5028.8830.2531.6333.0034.38
  • Test Results:
MainAuraZenSurvivalSurvival TierSpeedrunSpeedrun TierFunFun Tier
69.5572.00110.1832.73B-21.82C+31.64B
APEX1APEX2Base ScoreBase RankLow ScoreHi ScoreApex RankFinal ScoreFinalRank
60.8050.91251.7356302.64312.5352398.7158
  • Main Weapon Illustration:
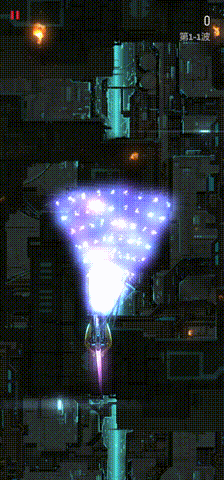
Survival

  • Very bad synergy between it's main and Barrier. The slow moving projectiles mean that going forward to place barriers upfield wastes DPS since you will not stack up projectiles for the next wave.
  • This results in Jn’Dur NEVER being able to use its inner lining. All barriers are deployed at the bottom of the field.
  • Because of Jn’Dur barriers being always at the bottom of the field, it is difficult to grab particles to sustain the barriers. When faced with consecutive waves of only large invaders, Jn’Dur will suffer a lot.
  • Jn’Dur slow moving main means that it requires its projectiles to flood the entire field, especially for waves with crowds and thus invaders everywhere.
  • This entails a very unique Barrier playstyle: Barriers are used for Jn’Dur manuveurability, deploying small barriers at the bottom of the field so that Jn’Dur can go to the sides of the field in order to flood the corners of the field.
  • The one thing if you need to remember about playing Jn’Dur is: SPAM. Spam barriers at the bottom of the field to no end. They will block bullets pretty effectively.
  • Jn’Dur works best with small barriers being spammed all around the field so that it has a sort of rectangular safety area at the bottom of the field to flood the field with its projectiles.
  • However, make sure to keep a small barrier that is deployable when the wave ends. This barrier is very important and allows you to charge MB safely. It also allows you to defend yourself against lasers which no matter how many small barriers you have already deployed, barriers don't last against them unless a fresh one is deployed just before the lasers fire.
  • Deploy this last barrier at hand at the start of the wave, only after all or nearly all of the bullets of the previous wave has died down. You don’t want your barrier to already start fading before the next wave of invaders start firing their weapons.
  • The blanket main means it's impossible for Jn'Dur to pop turrets. Jn'Dur relies on killing the entire invader. Thus bigger invaders like Vultures with dangerous turrets like spinners or MIRV Bloomers are a massive problem.
  • The technique is, at the end of waves with many Ravens, quickly head to the bottom of the screen for a very brief moment, then head back up to charge MB. This technique kills most of the Ravens on field with ease, particularly those all the way upfield.
  • Fortunately, Jn’Dur excels in frontline Vulture waves with Ravens at the back. This is because you can let the main weapon continue firing for a bit longer, and then, start charging MB. If the start time of charging MB is sufficiently delayed enough (and you don’t die from being too late of course), the combination of MB and the projectiles that were emitted before charging MB will hit the Ravens behind, pretty much instantly killing them all after MB goes off.
  • Be careful when deploying barriers when met with DDLs. Use barriers to shift yourself to completely avoid DDLs. Once you are safe, regulate your barriers very carefully such that you still get a constant stream of particles. Deploy barriers just before they are big enough that they get hit by DDLs.

Speedrun

  • There's a lot of RNG involved in playing Jn’Dur, as invaders that move away from the centerline of the field are very hard to catch and chasing them down just sometimes ain't worth it as the projectiles of the main that stray off the screen will cause a leakage of DPS. Most of the time, it's easier to pray that the invaders will come back and hit your projectiles instead.
  • An MB at the right time, being just able to catch all the Ravens, is the most ideal. This usually means charging MB rather late, and not always at the start of the wave.
  • Do not use MB for light waves. It is simply more efficient to continue using the main to flood the field and eliminate the tons of smaller invaders. Sparrows in particular get vaporized immediately if you use the main instead of using MB which incurs charging time. Only use MB if there are more than 2 Ravens on field.
  • For advanced optimisation, for waves with frontline Vultures, reserve a barrier and place the barrier such that the outer edge of the barrier is just below the Vulture so that you’ll be safe for its bullets. Then head up the edge of the barrier and charge MB to land MBc on the Vulture.
  • Ultimately, Jn'Dur is fastest in missions that feature many dense waves.

Fun

  • MB is definitely fun for its AoE damage.
  • The main is really fun. It looks like a blanket of snow raining down on the invaders. Just unfortunately, the impact sounds isn't as fun.
  • A fun thing you can do is to move forward as the main fires and stack the blankets of snow together.

Trivia

  • Jn’Dur Epsilon’s front strongly resembles R2-D2 from Star Wars.

APEX 1

  • Name: Fast Charge
  • Type: Zen
  • Description: High efficiency charge algorithms charge Mega Bomb more quickly.
  • Interpretation: The charging time decreases from 2s to 1.75s, the charging time recovery decreases from 4.5s to 3.5s.
  • Form: Gamma
  • Price: 15000
  • Score: 3.80 / 5

This apex is powerful. You can release a lot more particle disruptors and delay charging MB a bit more. The particle disruptors released while you were at the bottom of the field will move so slowly that even Ravens close to the bottom of the field get affected by it and thus go out with a BOOM with MB. With normal MB charge time, reaching Ravens nearer to the bottom of the field is very hard due to the need to charge MB earlier and thus not being able to flood the field a bit more to have those snow flakes to hit them before starting to charge MB. The Fast Charge also helps because barriers don’t always last long enough for you to stay inside safely for the entire duration of normal MB charge time, thus being able to pull off more MBs without impunity. Lastly, the decrease in charging time of MB allows for slightly riskier MB setups, and you can even land MBc on an invader or two.

APEX 2

  • Name: Extended Range
  • Type: Zen
  • Description: More potent energy particles increase the blast range.
  • Interpretation: The max radius increases from 400 to 500.
  • Form: Epsilon
  • Price: 25000
  • Score: 3.18 / 5

The increase in MB range allows Jn’Dur to stay more comfortably at the bottom of the screen to release more particle disruptors to destroy some of the front row invaders, as well as not needing to go slightly upfield and be in possible danger of going point blank with bullets. It is a more relaxed apex where you can sit back at the bottom of the screen and still be able to survive with less bullets being pumped at you with the upfield Ravens getting destroyed by the increased range. It also allows you to particularly hit upfield Ravens that are normally be unable to be touched by MB. This can be useful in the densest waves where going upfield will be very difficult. Unfortunately, because it is sometimes desirable to go slightly upfield to quickly collect more particles to spam deploy barriers before the barriers around you all get destroyed, it is better to sometimes just stay a bit more upfield to charge MB after collecting the particles instead, making the Gamma Apex more viable.

Video Illustration