
Tillat'Or

Looks like a GPU, especially the Gamma APEX.

Basic Info

  • No: 25
  • Ship: Tillat'or
  • Affinity: High Impact
  • Type: Double Defense
  • Main Weapon: Gatling Cannon
  • Aura: Barrier
  • Zen: Teleport
  • Rarity: Rare
  • Price: 1500
  • Main Description: A stream of bullets firing in a general forward direction with a tiny random angular deviance from the vertical.
  • Upgrade Info:
Level12345Ult
DPS25.0026.2527.5028.7530.0031.25
  • Test Results:
MainAuraZenSurvivalSurvival TierSpeedrunSpeedrun TierFunFun Tier
90.0072.0098.1839.27A-14.18C-27.27C+
APEX1APEX2Base ScoreBase RankLow ScoreHi ScoreApex RankFinal ScoreFinalRank
71.2724.73260.1851284.91331.4542412.1854
  • Main Weapon Illustration:

Survival

  • A common technique to employ is to use TP first, then upon arrival, activate barrier. In some ways, this acts as an extended clearance range of TP, if you are able to avoid the bullets inside the barrier after you land. This technique is more useful in MIRV/Shuriken missions.
  • Otherwise, this technique can be useful for threat containment, where you TP upfield to place a barrier around either a dangerous region of bullets, or around a dangerous turret. This is more useful in General/Boomerang missions.
  • When placing a barrier to contain the threat by bullets, be sure you are able to exit the barrier safely. You'll need to consider the size of barrier and the location of your arrival. Keep the barrier small otherwise you are going to have more trouble getting out.
  • And even after getting out, be sure you are actually safe to retreat back to the bottom of the screen. If it's not safe, you can try to wedge yourself between the inner and outer lining of the barrier to give yourself a little more time.
  • From there you can choose to TP back down, or move back down after things have cooled. Just remember the inner lining won't last long at all so be quick in deciding.
  • If you are using the barrier to contain the threat of a turret, make sure the turret isn't going to fire once you TP in. After TP-ing and placing the barrier, quickly extract yourself from the barrier.
  • TP may help in getting you out after placing barrier upfield at the start of a wave, but usually it's just easier to quickly swipe down instead of waiting for TP to charge and risk dying.

Speedrun

  • The main can be optimized to hit your targets at nearly all times, but that's about it.
  • TP helps to switch targets much faster, but bear in mind you lose DPS when you charge TP, so be careful of its usage.

Fun

  • The main is pretty satisfying to hear.
  • Green GPU's unique fun.mp4

Trivia

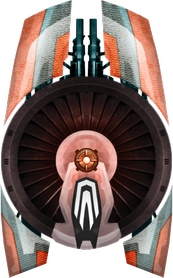
  • Tillat’Or is one of the 7 ships that doesn’t use thrusters to fly in Phoenix 2. Instead, it uses a Vertical Take Off Landing (VTOL) lift fan to keep itself afloat.
  • Tillat'Or is one of the only 3 ships that has a nonstop fan (Oran, Stinger, Tillat'Or).

APEX 1

  • Name: Reflector
  • Type: Aura
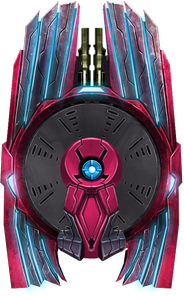
  • Description: Laser reflect on the Barrier outer surface.
  • Interpretation: Laser will be reflected to invaders with 10 damage per second.
  • Form: Gamma
  • Price: 15000
  • Score: 4.45 / 5

Unfortunately, unlike the other Barrier Reflect Apexes, Tillat’Or loses out due to its inability to make good usage of its Teleport for useful purposes. It is only useful to teleport outside the barriers to mass activate the laser MIRVs, but with the heavy presence of darts around and a high risk of darts being shot out at point blank range, it is difficult to find a safe spot to teleport to. The number of laser MIRVs are not always a lot in such Laser/Dart missions, thus making Teleport quite useless. Nevertheless, it is an enjoyable apex if you like Tillat’Or.

APEX 2

  • Name: Extended Clearance
  • Type: Zen
  • Description: Energy from the Teleport is released on arrival to extended the range of the Arrival EMP.
  • Interpretation: The clearing space increases from 50 to 80.
  • Form: Epsilon
  • Price: 25000
  • Score: 1.55 / 5

This apex makes it easier for Tillat’Or to tackle MIRV/Shuriken missions. Particularly, the extended clearance means that you can delete more MIRVs in one TP. This makes it much more flexible in finding a spot to TP to, such that your arrival location will not be greeted by MIRVs exploding in your face due to the insufficient clearance space normal TP provides, being unsufficient to clear out some of the MIRVs, leading to unexpected MIRV pellets in your face with no time to react. Just be sure to deploy your small barrier immediately when you arrive so that you wouldn’t be greeted with more pellets in your face.

Video Illustration